

Running out of storage on your MacBook can slow down everyday tasks, prevent software updates, and leave you wondering what to remove. The good news is that you don’t have to delete your photos, documents, or other important files to recover a significant amount of disk space.
Most storage problems come from temporary files, old backups, application leftovers, duplicate downloads, and other data that accumulates quietly over time. By identifying what’s using your storage and cleaning it safely, you can often recover several gigabytes without losing anything you actually need.
This guide explains how to free up storage on a MacBook without deleting important files, starting with the safest methods before moving on to more advanced cleanup techniques.
Check What’s Using Your Mac’s Storage
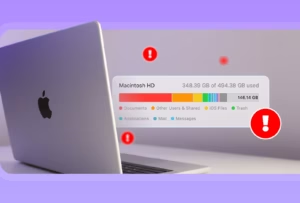
Before deleting or moving anything, find out where your storage has gone.
On macOS Ventura, Sonoma, Sequoia, and newer:
- Open System Settings.
- Click General.
- Select Storage.
Older versions of macOS use:
- Click the Apple menu.
- Choose About This Mac.
- Open the Storage tab.
Give macOS a minute to calculate storage usage. You’ll see categories such as:
- Applications
- Documents
- Photos
- Messages
- macOS
- System Data
- iCloud Drive
This overview helps you focus on the categories consuming the most space instead of deleting files blindly.
Empty the Trash
Files remain on your drive after you move them to the Trash.
To permanently remove them:
- Open Trash from the Dock.
- Review the contents.
- Right-click and choose Empty Trash.
If you accidentally moved an important file to the Trash, restore it before emptying it.
Many people forget this step and assume deleted files are already gone.
Use Apple’s Built-In Storage Recommendations
macOS includes several storage management tools designed to remove unnecessary data without affecting your personal files.
Go to System Settings > General > Storage.
Depending on your macOS version, you may see recommendations such as:
- Store files in iCloud
- Optimize Storage
- Empty Trash Automatically
- Review Large Files
These recommendations are generally safe because they focus on reducing duplicate or unnecessary data rather than deleting personal documents.
Optimize Storage
When enabled, macOS can automatically remove:
- Apple TV movies you’ve already watched
- Old email attachments
- Cached media that can be downloaded again
The original content remains available if you need it later.
Review Large Files
This section lists files occupying the most space.
Instead of deleting everything, review each item carefully.
You may find:
- Old installer files (.dmg)
- ZIP archives
- Duplicate videos
- Previous project exports
- Virtual machine images you no longer use
These often consume several gigabytes.
Remove Downloads You No Longer Need
The Downloads folder is one of the biggest storage offenders.
Open Finder > Downloads.
Sort files by Size.
Look for items like:
- Software installers
- Old ZIP files
- Duplicate PDFs
- Temporary work files
- Screen recordings
- ISO images
Many installers can always be downloaded again later.
If you’re unsure whether a file is still needed, move it to an external drive instead of deleting it.
Delete Old iPhone and iPad Backups
If you’ve backed up an iPhone or iPad to your Mac multiple times, older backups may still be taking up space.
To remove them:
- Open Finder.
- Connect your iPhone if necessary.
- Select your device.
- Click Manage Backups.
Review each backup before deleting it.
Keep the newest backup unless you know you no longer need it.
A single backup can consume several gigabytes.
Clear Browser Cache
Web browsers store cached images, scripts, and website files to load pages faster.
Over time, this cache can grow surprisingly large.
Safari
- Open Safari.
- Go to Settings.
- Enable the Develop menu if necessary.
- Choose Empty Caches.
Google Chrome
- Open Chrome.
- Press Command + Shift + Delete.
- Select Cached images and files.
- Clear the cache.
Mozilla Firefox
- Open Firefox.
- Go to Settings.
- Open Privacy & Security.
- Clear Cached Web Content.
This removes temporary files only. It doesn’t delete bookmarks or saved passwords unless you choose those options.
Remove Application Cache Files
Applications create cache files to improve performance.
Most are safe to remove because they’ll be recreated automatically.
To view cache files:
- Open Finder.
- Click Go.
- Choose Go to Folder.
- Enter:
~/Library/CachesAvoid deleting the entire Caches folder.
Instead:
- Open folders belonging to apps you no longer use.
- Remove unusually large cache folders.
- Leave active system folders alone unless you know their purpose.
Restart the Mac afterward so applications can rebuild what they need.
Delete Old macOS Update Files
macOS occasionally leaves downloaded update packages behind.
You can check:
/Library/UpdatesIf the folder contains completed installers from updates you’ve already installed, they can usually be removed safely.
Do not delete files if an update is currently downloading or installing.
Remove Unused Applications Properly
Unused apps occupy storage even when you rarely open them.
Drag-and-drop removal leaves behind support files.
Instead:
- Open Applications.
- Delete apps you genuinely no longer use.
- Remove associated support files if they’re no longer needed.
Check:
~/Library/Application Supportand
~/Library/ContainersOnly delete folders belonging to applications you’ve already removed.
Find Duplicate Files
Duplicate files often appear after years of downloads, backups, and file transfers.
Common duplicates include:
- Photos
- Videos
- ZIP archives
- PDFs
- Documents
Instead of searching manually, use Finder’s search filters or a reputable duplicate finder.
Always verify duplicates before deleting them.
Some files may share the same name while containing different content.
Move Large Files to External Storage
If you regularly work with:
- 4K videos
- RAW photos
- Virtual machines
- Music production projects
- Game libraries
consider moving completed projects to an external SSD.
This keeps your Mac fast while preserving your work.
External SSDs are especially useful because they’re much faster than traditional external hard drives.
Store Files in iCloud Drive
If you subscribe to iCloud+, macOS can keep infrequently used files in the cloud while leaving placeholders on your Mac.
Enable:
System Settings > Apple Account > iCloud > iCloud Drive
Then enable Optimize Mac Storage.
Frequently used files remain downloaded.
Older files are automatically removed from local storage when space becomes limited.
You’ll still see them in Finder and can download them whenever needed.
An internet connection is required to access files that aren’t stored locally.
Delete Mail Attachments You No Longer Need
Mail attachments accumulate quietly over time.
If you receive large PDFs, videos, or presentations regularly, they may consume several gigabytes.
Review old messages with large attachments and remove downloads you no longer need.
Deleting the local attachment usually doesn’t affect the email stored on the mail server, although behavior varies between email providers.
Clean Up Messages Attachments
The Messages app stores:
- Photos
- Videos
- Voice recordings
- GIFs
- Shared files
Open Messages.
Review conversations containing large media files.
Delete attachments that no longer matter.
This can recover considerable storage, especially if you exchange lots of videos.
Remove Old Screen Recordings
macOS saves screen recordings as high-quality video files.
Even short recordings can exceed hundreds of megabytes.
Check:
- Desktop
- Downloads
- Movies folder
Delete recordings you no longer need or archive them to external storage.
Clear Xcode, Docker, or Developer Files
If you’re a developer, these tools often consume far more storage than personal documents.
Examples include:
- Xcode DerivedData
- iOS Simulator data
- Device support files
- Docker images
- Docker containers
- Homebrew cache
Cleaning developer files can recover tens of gigabytes.
Only remove items you understand, since some may require lengthy downloads or rebuilds later.
Remove Old Time Machine Local Snapshots
Time Machine creates local snapshots when your backup drive isn’t connected.
Normally, macOS removes them automatically when storage becomes scarce.
If they remain unusually large, advanced users can inspect them using Terminal.
For most people, manual removal isn’t necessary because macOS manages them automatically.
Reduce System Data Safely
Many Mac users notice that System Data occupies an unexpectedly large amount of storage.
This category can include:
- Caches
- Logs
- Temporary files
- Local snapshots
- Application support files
- Plug-ins
- Fonts
- Virtual memory
There isn’t a single folder called “System Data.”
Instead of trying to delete it directly, reduce it by:
- Restarting your Mac.
- Removing application caches.
- Deleting old installers.
- Emptying the Trash.
- Updating macOS.
- Removing unused apps.
- Clearing browser caches.
System Data often shrinks automatically after a restart or after macOS finishes maintenance tasks.
Restart Your Mac
A restart may sound too simple, but it clears:
- Temporary files
- Some caches
- Swap files
- Temporary system resources
If you rarely restart your MacBook, this alone may recover some storage and improve responsiveness.
Storage Cleanup Mistakes to Avoid
Trying to recover space too quickly can cause unnecessary problems.
Avoid these common mistakes:
- Deleting files from the System folder.
- Removing unknown Library folders.
- Deleting random Terminal files without understanding their purpose.
- Using “cleaner” apps that promise unrealistic storage gains.
- Removing backups before confirming you have another copy.
- Deleting photo libraries without verifying they’re safely backed up.
If you’re unsure about a file, move it to external storage instead of deleting it immediately.
When an External Drive Makes More Sense
Sometimes the issue isn’t unnecessary files but limited internal storage.
Moving archived projects to an external SSD is often a better long-term solution than constantly cleaning your Mac.
This approach works especially well for:
- Video editing
- Photography
- Software development
- Audio production
- Large game libraries
Keeping active projects on the internal SSD while archiving older work externally provides a good balance between speed and available space.
If Your Mac Is Still Running Out of Storage
If you’ve completed all of the steps above and your MacBook still has very little free space, investigate these possibilities:
- A photo or video library that’s larger than expected.
- Virtual machines consuming hundreds of gigabytes.
- Developer tools and simulator files.
- Corrupted cache files.
- A failed macOS update leaving temporary data behind.
- Disk usage caused by third-party backup software.
In rare cases, a storage calculation bug can also make categories appear larger than they actually are. Restarting the Mac or updating macOS often corrects these reporting issues.
Final Thoughts
Learning how to free up storage on MacBook without deleting important files is mostly about removing temporary, duplicate, and replaceable data instead of personal documents. Start by checking what’s using your storage, then work through Apple’s built-in recommendations, browser caches, downloads, old backups, and unused applications. If your work naturally involves large media files or development tools, moving completed projects to an external SSD or enabling iCloud’s storage optimization can provide lasting relief without sacrificing the files you want to keep.
By cleaning your Mac methodically instead of deleting data at random, you’ll recover storage safely while keeping your important documents, photos, and projects intact.
Related Articles
- How to Use Split View on Mac for Better Productivity
- Why Is My MacBook Overheating During Normal Use?
- How to Recover Permanently Deleted Files Without Backup on Mac
- How to Reset MacBook Without Erasing iCloud Account
If you think there’s been a mistake here, please do let us know by commenting on this post or Contact Us. And a member of our Content Integrity Team will review this decision with you.





