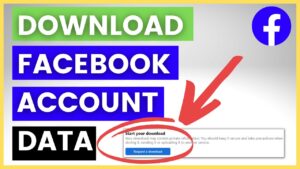
If you want a copy of your Facebook photos, posts, messages, comments, profile information, and other account activity, you do not need to save everything manually. Facebook provides a built-in export tool in Meta Accounts Center that lets you choose exactly what information to download, how much of your history to include, and whether you want the archive in HTML or JSON format.
Meta moved Facebook’s download and access controls into Accounts Center, where they can also be managed alongside information from other Meta accounts.
The process is useful for several reasons. You might want a personal backup before deleting Facebook, need copies of old photos and posts, want to review the information associated with your account, or simply keep an offline record of years of activity. The steps below cover the current Facebook export process and explain what each setting actually does.
What Facebook Data Can You Download?
Facebook’s export tool can include much more than photographs. The exact categories available depend on your account and the information associated with it, but the archive can contain things such as posts, uploaded photos and videos, comments, reactions, messages, friends, profile information, events, and other activity associated with your account. Some account and advertising information may also appear in the archive.
You do not have to download everything. Facebook lets you select specific categories, which is useful if your main goal is saving photographs, retrieving old posts, or examining a particular type of account activity.
For example, someone who only wants a backup of their photos and videos does not necessarily need to request the entire account archive. Selecting only the relevant categories can make the export smaller and easier to manage.
How to Download Your Facebook Data on a Computer
The easiest way to manage a large Facebook archive is from a desktop browser. Facebook’s current controls are located in Meta Accounts Center rather than the older standalone “Download Your Information” area.
1. Open Facebook settings
Sign in to Facebook and click your profile picture in the upper-right corner.
Select Settings & privacy, then choose Settings.
Look for Accounts Center. Depending on the version of Facebook you are using, it may appear prominently near the top of the settings page.
2. Open Your information and permissions
Inside Accounts Center, find Your information and permissions.
Select Download your information.
Meta moved this function into Accounts Center so that information-management tools can be handled from one central location across its services.
If you have Facebook and other Meta accounts connected to the same Accounts Center, you may see more than one account or profile available for export. Make sure you select the Facebook profile containing the information you actually want.
3. Create a new export
Choose the option to create or request an export.
Facebook will ask how much information you want to download. You will generally be able to choose between all available information and selected categories.
If you want a complete backup, choose the option that includes all available information. If you only need certain files, selecting specific information is usually more practical.
4. Choose where the information should go
For a normal backup, choose Export to device or the equivalent download-to-device option.
Facebook also provides options for transferring certain information to another service. That is different from creating an archive on your computer. If your goal is to keep a local copy, make sure the destination is your device.
Meta’s Accounts Center supports both downloading information and transferring information, so selecting the wrong option can lead you into a different workflow.
5. Select the information you need
If you selected specific information instead of everything, Facebook will display categories you can include in the export.
The available categories can include:
- Posts
- Photos and videos
- Comments and reactions
- Friends
- Messages
- Profile information
- Events
- Other activity and account information
Select only the categories you need if you are trying to keep the archive manageable.
If you are preparing to delete your Facebook account, however, choosing all available information is generally the safer approach. You do not want to discover later that an important category was left out of your backup.
6. Choose the date range
Facebook lets you control the period covered by the export.
If you want everything Facebook has available for the selected categories, choose All time. If you only need recent activity, choose a narrower range such as the last year or a custom period.
Date filtering is particularly useful when you are looking for old information without wanting to create a massive archive.
For example, if you joined Facebook many years ago but only want photographs from the last three years, there is little reason to request every category from the beginning of your account.
7. Choose the file format
Facebook normally gives you a choice between HTML and JSON.
Choose HTML if you want to read and browse the information yourself. The archive is organized so that you can open the relevant HTML files in a web browser.
Choose JSON if you are working with the data programmatically or need structured data that software can process more easily.
For most people who simply want to inspect their Facebook history, HTML is the easier choice. JSON is more useful for technical users who understand structured data.
8. Select media quality
If your export includes photographs or videos, Facebook lets you choose the quality of downloaded media.
Use High when preserving your uploaded media is the priority and you have enough storage space.
Lower quality can reduce the size of the archive, which may make sense if you only need a reference copy. It is not the best choice when the purpose of the export is to preserve photographs and videos for the long term.
Keep in mind that a Facebook export is not necessarily the same thing as retrieving the original file from the device that created it. If an original photograph is important, keep the original file separately whenever possible.
9. Start the export
Review the account, categories, date range, format, media quality, and destination.
Then select Create files, Start export, or the equivalent button shown in your version of Facebook.
Facebook will prepare the archive rather than downloading everything immediately. Large exports can take time because Facebook has to collect and package the requested information.
How to Download Facebook Data on a Phone
You can also request your Facebook information from the mobile app. The exact placement of menus can change as Facebook updates its interface, but the important destination is still Accounts Center.
Open the Facebook app and go to the menu. From there, open Settings & privacy, then Settings.
Look for Accounts Center, followed by Your information and permissions. Select Download your information and continue through the same export options described above.
Facebook has moved these controls into Accounts Center, so older tutorials that tell you to look specifically for a separate “Your Facebook Information” menu may not match the current interface.
If a menu appears slightly different on your phone, look for the words Accounts Center, Your information and permissions, and Download your information rather than relying on the exact position of a button.
How to Choose the Right Facebook Export Settings
The settings matter because there is no single configuration that is ideal for every situation.
| Goal | Information | Date range | Format | Media quality |
|---|---|---|---|---|
| Complete account backup | All available information | All time | HTML | High |
| Save photos and videos | Photos and videos | All time | HTML | High |
| Review account data | Selected categories | Relevant period | HTML | Medium or High |
| Process data with software | Required categories | Required period | JSON | Depends on need |
| Save recent activity | Selected categories | Recent period | HTML | Depends on need |
If you are creating a long-term personal backup, All time + all relevant information + HTML + high media quality is a sensible starting point.
If storage space is limited, split a large export into smaller date ranges or download only the categories you actually need.
What Happens After You Request the Download?
Facebook does not necessarily produce the archive immediately. The service first prepares the requested files and makes them available when processing is finished.
You should receive a notification when the download is ready. You can then return to the download section in Accounts Center and access the available export.
The exact processing time depends on the amount of information requested. A small export can be ready relatively quickly, while a large account archive containing years of photographs, videos, messages, and activity can take considerably longer.
Do not assume that a request that takes longer is broken. Large archives naturally require more information to collect and package.
Meta’s download system also gives you a limited period in which to retrieve a prepared file. Recent guidance from Meta’s support ecosystem indicates that Facebook download files may only remain available for a short period, so download the archive promptly after receiving the notification rather than leaving it indefinitely.
How to Open Your Facebook Data After Downloading It
Facebook generally packages downloaded information into an archive file, commonly a ZIP file.
On Windows, right-click the downloaded ZIP file and choose Extract All. Select a folder where you want the extracted information stored.
After extraction, you will see folders and files containing the categories you requested.
If you selected HTML, look for the relevant HTML files and open them in a browser. The archive may contain an index or navigation page that makes it easier to move between different sections.
Do not delete the original ZIP file immediately. Keep it until you have checked that the extracted files open correctly and contain the information you expected.
If you selected JSON, the files will look much less familiar. JSON is designed to store structured information, not to provide a convenient browsing experience for ordinary users. You can open it in a text editor, code editor, or software designed to process JSON data.
Why Your Facebook Photos May Not Look Like the Originals
One common mistake is assuming that downloading Facebook data will always restore every image exactly as it existed before uploading.
Facebook’s archive can provide copies of your uploaded media, but the exported file should not be treated as a guaranteed replacement for the original photographs stored on your phone, camera, or computer.
This is one reason to keep important originals separately. If you have family photographs, professional images, or other irreplaceable files, your primary backup should be the original files you control.
When creating a Facebook export specifically for photographs and videos, choose the highest available media quality. That gives the export the best chance of preserving the media at the quality Facebook makes available through the download system.
What to Do If Your Facebook Download Is Too Large
A complete Facebook archive can become surprisingly large if your account contains years of photos and videos.
If the export is difficult to handle, you do not necessarily need to request everything again.
Start by deciding what you actually need. If your main concern is photographs, export the photo and video category rather than every type of Facebook activity.
You can also narrow the date range. Instead of requesting ten or fifteen years of information in one archive, create several smaller exports covering different periods.
This can also make it easier to organize the resulting files. For example, you could maintain separate folders for older photographs, recent photographs, posts, and other account information.
Avoid repeatedly creating full exports when a smaller export would solve the problem. Each request requires Facebook to prepare another archive, and large requests can take substantially longer.
Facebook Data Download Not Working? Try These Fixes
If you cannot find the download option, first make sure you are looking inside Accounts Center. Facebook has changed the location of several privacy and information controls over time, so instructions written for older versions may point to menus that no longer exist.
If the export option appears but you cannot create a file, check that you are logged into the correct Facebook account or profile. This matters particularly when multiple Meta accounts are connected through Accounts Center.
If a requested archive is still being prepared, creating another identical request immediately is usually unnecessary. Check the download section for the status of the existing request first.
If the download fails after the file has been prepared, try again from a stable internet connection and use a desktop browser for a particularly large archive. Make sure your computer also has enough free storage for both the ZIP file and the extracted contents.
A large archive can require considerably more storage after extraction than the compressed download suggests. Leave additional free space instead of trying to extract a nearly full drive.
How to Protect Your Facebook Data After Downloading It
Your Facebook archive may contain personal information that you would not want a stranger to access.
Treat the downloaded file like a sensitive personal document. Do not upload the archive to random websites simply because they claim they can “analyze” or “convert” your Facebook data.
If you store the archive on a computer, make sure the account is protected with a strong password. If you keep a copy on an external drive, store that drive somewhere secure.
You should also think about whether you really need every category in a long-term archive. Keeping unnecessary sensitive information indefinitely increases the amount of personal data you have to protect.
For especially important backups, maintaining more than one copy is safer than relying on a single hard drive. A local copy can protect you from an online account problem, while a second copy stored separately protects against device failure or loss.
Download Your Data Before Deleting Facebook
If you are downloading your Facebook information because you intend to delete your account, complete the export before starting the deletion process.
This gives you an opportunity to check the archive while your account is still accessible. Open the downloaded files, confirm that important photographs and other information are present, and make another backup if necessary.
Deleting an account is different from downloading its information. A data export creates a copy of information available through Facebook’s export system; it does not preserve your account itself, your friends’ accounts, or your ability to log in.
Meta’s account-management tools place downloading and account deletion in different areas of Accounts Center. Account deletion is handled through Personal details, followed by Account ownership and control, rather than through the download screen.
If you are leaving Facebook permanently, do not treat the notification that your download is ready as the end of the process. Actually download the archive, extract it, and verify the files before deleting your account.
Downloading Facebook Data Is Better Than Saving Posts Manually
Saving individual Facebook posts or photographs one at a time makes sense when you only need a handful of files. It becomes impractical when you have years of activity.
The built-in export tool is designed for exactly that situation. It lets you specify the account, information categories, date range, destination, file format, and media quality from one place.
The most important choice is matching the export to your purpose. Use HTML when you want to browse your information, JSON when you need structured data for technical processing, and high media quality when photographs and videos are the main reason for the backup.
If you are preparing to leave Facebook, request the archive early, download it as soon as it becomes available, and verify the contents before deleting anything. That small amount of preparation can prevent years of photos, posts, and other personal records from becoming much harder to recover later.
Facebook’s data-download controls are now centered in Meta Accounts Center, so if an older tutorial gives you different menu names, look for the current Your information and permissions > Download your information path instead.
If you think there’s been a mistake here, please do let us know by commenting on this post or Contact Us. And a member of our Content Integrity Team will review this decision with you.