

Adding two external monitors to a MacBook can dramatically improve your workspace, but the setup process depends entirely on which MacBook model you own. Some MacBooks support two or more displays without any extra hardware, while others are limited by Apple’s hardware design and require a workaround.
If you’ve connected two monitors and only one turns on, or macOS mirrors both displays instead of extending your desktop, you’re likely running into your MacBook’s external display limitations rather than a faulty cable or monitor.
This guide explains how to identify your MacBook’s capabilities, choose the right connection method, troubleshoot common problems, and configure everything correctly.
Why MacBook Support for External Monitors Varies
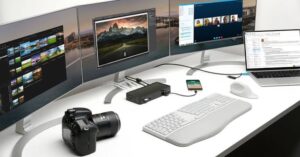
Unlike many Windows laptops, MacBooks don’t all support the same number of external displays.
The biggest factor is the Apple chip or Intel processor inside your Mac.
For example:
- Some Intel MacBooks can drive up to four external displays.
- MacBooks with the original M1 or M2 chips usually support only one external monitor.
- Newer Pro and Max chips support multiple displays without adapters.
- Certain newer base-model chips support two displays, but only under specific conditions.
Because of these differences, the first step is identifying your MacBook model.
Check Which MacBook You Have
To find your Mac model:
- Click the Apple menu.
- Select About This Mac.
- Look for:
- Model name
- Chip or processor
- Year
Examples include:
- MacBook Air (M1, 2020)
- MacBook Air (M3, 2024)
- MacBook Pro 14-inch (M3 Pro)
- MacBook Pro 16-inch (Intel)
Knowing this information makes it much easier to determine the correct setup.
External Monitor Support by MacBook Chip
The following table summarizes the capabilities of common MacBook models.
| MacBook | Native External Display Support |
|---|---|
| Intel MacBook Air | Usually 1 or 2 displays depending on model |
| Intel MacBook Pro | Up to 4 displays on many models |
| M1 MacBook Air | 1 external monitor |
| M1 MacBook Pro 13-inch | 1 external monitor |
| M2 MacBook Air | 1 external monitor |
| M2 MacBook Pro 13-inch | 1 external monitor |
| M3 MacBook Air | Up to 2 displays when the laptop lid is closed |
| M3 MacBook Pro | Usually 2 displays |
| M3 Pro | Multiple displays |
| M3 Max | Up to 4 external displays |
| M4, M4 Pro, and M4 Max models | Multiple displays depending on configuration |
If your MacBook officially supports two displays, setup is straightforward. If not, you’ll need a DisplayLink dock or adapter.
Before Connecting the Monitors
Before plugging everything in, make sure you have:
- Two compatible monitors
- HDMI, USB-C, DisplayPort, or Thunderbolt cables
- A USB-C hub or Thunderbolt dock if your Mac has limited ports
- The latest version of macOS, if possible
Also determine which inputs your monitors support.
Most modern monitors include:
- HDMI
- DisplayPort
- USB-C
Older displays may require adapters.
Method 1: Connect Two Monitors on a MacBook That Natively Supports Them
If your MacBook supports two or more external displays, this is the easiest method.
Step 1: Connect the First Monitor
Use either:
- USB-C to USB-C
- USB-C to DisplayPort
- HDMI
- Thunderbolt
The display should appear automatically.
Step 2: Connect the Second Monitor
Connect the second monitor using another available Thunderbolt or HDMI connection.
If you’re using a dock, connect both monitors to the dock first before attaching it to the MacBook.
macOS should detect both displays within a few seconds.
Step 3: Open Display Settings
Go to:
System Settings → Displays
You’ll see all connected displays.
If one isn’t visible, click Detect Displays while holding the Option key on older macOS versions.
Arrange Your Displays
The monitors shown in Display Settings represent their physical positions.
Drag them so they match your desk setup.
For example:
- Left monitor
- MacBook display
- Right monitor
Doing this allows the mouse pointer to move naturally between screens.
You can also drag the white menu bar to choose your primary display.
Enable Extended Desktop
If both monitors show identical content, macOS is mirroring them.
To create separate workspaces:
- Open Displays.
- Select Arrangement.
- Turn off Mirror Displays.
Each monitor should now function independently.
Method 2: Use a Thunderbolt Dock
Many MacBook Pro models work best with a Thunderbolt dock.
A quality dock can provide:
- Two monitor outputs
- USB ports
- Ethernet
- SD card reader
- Charging through one cable
This creates a cleaner desk setup because only one cable connects to the MacBook.
Thunderbolt docks are generally more reliable than inexpensive USB-C hubs, especially when running high-resolution displays.
Method 3: Use DisplayLink for M1 and M2 MacBooks
If you own an M1 or M2 MacBook Air or the 13-inch MacBook Pro, Apple limits these models to one native external display.
To connect two monitors, you need DisplayLink technology.
DisplayLink uses software along with a compatible dock or adapter to create additional displays.
Install DisplayLink Manager
- Download DisplayLink Manager.
- Install the software.
- Restart your Mac if prompted.
- Allow Screen Recording permission when macOS requests it.
This permission allows DisplayLink to generate additional displays.
Without it, the second monitor usually won’t work.
Connect Both Monitors
Once DisplayLink is running:
- Connect the dock.
- Attach both monitors.
- Wait a few moments for macOS to detect them.
The additional monitor should appear alongside your primary display.
Method 4: Connect Two Monitors to an M3 MacBook Air
The M3 MacBook Air introduced improved external display support.
However, there’s an important limitation.
Two external monitors are supported only when the MacBook lid is closed.
This is commonly called clamshell mode.
To use it:
- Connect both monitors.
- Plug the MacBook into power.
- Connect a keyboard and mouse.
- Close the lid.
macOS will switch to using the external displays.
If you open the lid again, display behavior may change depending on your configuration.
Choosing the Best Cable Connection
Not all video connections provide the same capabilities.
| Connection | Best For |
|---|---|
| USB-C | Modern monitors with video and charging |
| Thunderbolt | Multiple high-resolution displays |
| DisplayPort | High refresh rates and 4K monitors |
| HDMI | Most TVs and monitors |
Whenever possible, avoid stacking multiple adapters together.
For example:
USB-C → HDMI adapter → HDMI switch → monitor
Every additional adapter increases the chance of connection problems.
Common Problems and How to Fix Them
Even compatible MacBooks sometimes fail to detect both monitors immediately.
Here are the most common issues.
Only One Monitor Is Detected
Possible causes include:
- Unsupported Mac model
- Faulty cable
- Dock limitation
- DisplayLink not installed
- Loose connection
Try:
- Swapping cables
- Connecting monitors individually
- Restarting the Mac
- Testing another USB-C port
- Updating macOS
Both Monitors Mirror Each Other
This usually happens when mirroring is enabled.
Open Displays and disable Mirror Displays.
If you’re using a USB-C hub, verify it supports dual extended displays rather than mirrored output. Some inexpensive hubs can only duplicate the image.
One Monitor Keeps Disconnecting
Intermittent disconnections are often caused by:
- Low-quality USB-C hubs
- Insufficient power
- Faulty cables
- Dock firmware issues
Connecting the dock directly to the Mac instead of through another adapter can improve stability.
Black Screen After Connecting
Try these steps:
- Power cycle the monitor.
- Disconnect and reconnect the cable.
- Select the correct monitor input.
- Restart your MacBook.
- Test another cable.
If only one monitor remains black regardless of which cable you use, test that monitor with another computer to rule out hardware failure.
Wrong Resolution
Go to:
System Settings → Displays
Choose the monitor.
Select a different resolution.
If text appears blurry, enable the display’s recommended scaled resolution instead of forcing a non-native setting.
Tips for the Best Dual-Monitor Experience
A few adjustments can make working across multiple screens much smoother.
- Use identical monitor resolutions when possible.
- Position monitors at similar heights to reduce neck strain.
- Keep frequently used apps on the same monitor.
- Enable Night Shift if you work late.
- Use Display Settings to adjust scaling instead of changing monitor sharpness.
- Update dock firmware if your manufacturer provides firmware updates.
If you regularly connect and disconnect monitors, investing in a reliable Thunderbolt dock usually saves time and reduces connection issues.
Common Mistakes to Avoid
Many dual-monitor problems come down to incorrect assumptions.
Avoid these common mistakes:
- Assuming every USB-C hub supports two extended displays.
- Buying an HDMI splitter instead of a dual-display dock. Most HDMI splitters mirror the image rather than extend it.
- Ignoring your MacBook’s display limitations before purchasing accessories.
- Using damaged or outdated HDMI cables that cannot handle higher resolutions.
- Forgetting to grant DisplayLink the permissions it requires.
Checking compatibility before buying hardware often prevents unnecessary expense.
When You Need DisplayLink Instead of a Dock Alone
A standard USB-C dock does not bypass Apple’s display limitations.
If your MacBook officially supports only one external monitor, adding a regular dock alone will not create a second independent display.
DisplayLink is required because it relies on software to generate additional displays through compatible hardware.
If your MacBook already supports multiple monitors natively, DisplayLink is unnecessary and may add extra complexity.
Final Thoughts
Learning how to connect two external monitors to a MacBook starts with identifying your Mac’s hardware. Once you know what your model supports, choosing the right setup becomes much easier.
MacBooks with Pro, Max, and many Intel processors can usually connect two or more displays directly. Base M1 and M2 models typically require a DisplayLink-compatible dock to add a second external monitor, while the M3 MacBook Air supports two external displays when used in clamshell mode.
Using quality cables, a reliable dock when needed, and the correct display settings helps avoid most connection problems. If a monitor isn’t detected, checking compatibility first is often more productive than replacing cables or reinstalling macOS.
Related Articles
- How to Use Split View on Mac for Better Productivity
- How to Update macOS Safely Without Losing Data
- How to Change the Default Browser on MacBook
- How to Fix MacBook Keyboard Keys Not Working
If you think there’s been a mistake here, please do let us know by commenting on this post or Contact Us. And a member of our Content Integrity Team will review this decision with you.





