

If you often end up with a desktop full of overlapping windows, finding the right app can become frustrating. Stage Manager on macOS is designed to solve that problem by automatically organizing open windows while keeping the app you’re working on front and center.
Instead of manually minimizing, resizing, or rearranging everything throughout the day, you can switch between tasks with fewer distractions.
Stage Manager first appeared in macOS Ventura and continues to be available in newer versions of macOS, including Sonoma and Sequoia.
While the feature behaves similarly across these releases, Apple has made small improvements over time, so you may notice slight differences depending on the version you’re using.
This guide explains how to use Stage Manager on macOS, customize its behavior, troubleshoot common issues, and decide when it’s the right workspace tool compared to Mission Control, Spaces, or Split View.
What Is Stage Manager on macOS?
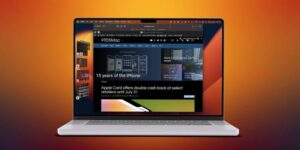
Stage Manager is a window management feature that automatically groups and organizes your open application windows.
The app you’re actively using remains in the center of the screen, while your other open apps appear as thumbnails along the left edge of the display. Clicking one of those thumbnails instantly switches to that application without minimizing or closing your current work.
Unlike Mission Control, which temporarily shows every open window, Stage Manager continuously organizes your workspace while you work.
Its main goals are to:
- Reduce desktop clutter
- Keep the current task in focus
- Make switching between apps faster
- Organize multiple windows without requiring manual arrangement
If you frequently jump between browsers, documents, messaging apps, and creative software, Stage Manager can make daily multitasking feel more organized.
Before You Turn On Stage Manager
Stage Manager requires:
- macOS Ventura or later
- A Mac that supports Ventura, Sonoma, or newer versions
- At least one application open
If you’re running Monterey or an earlier macOS release, the feature isn’t available.
You can check your macOS version by opening:
Apple menu → About This Mac
If your Mac supports a newer version, updating macOS may add Stage Manager along with other productivity improvements.
How to Enable Stage Manager
There are two simple ways to turn it on.
Method 1: From Control Center
This is the quickest option.
- Click the Control Center icon in the menu bar.
- Select Stage Manager.
- Click it once to enable the feature.
As soon as it’s enabled, macOS reorganizes your workspace. The current app stays in the middle, while other apps move into the left-side strip.
Click the button again whenever you want to turn Stage Manager off.
Method 2: From System Settings
You can also enable it through macOS settings.
- Open System Settings.
- Select Desktop & Dock.
- Scroll to the Stage Manager section.
- Turn Stage Manager on.
This area also contains additional customization options that aren’t available from Control Center.
Understanding the Stage Manager Interface
The feature becomes much easier to use once you understand its layout.
Center Workspace
The center of the screen contains the application you’re currently working in.
If multiple windows belong to that application, they can remain grouped together depending on your settings.
Left Sidebar
The left side displays recently used applications.
Each thumbnail represents either:
- A single app window
- A grouped collection of windows from the same app
Selecting a thumbnail immediately brings that application into focus.
Desktop
Your desktop remains available behind your windows.
Depending on your Stage Manager settings, desktop items can remain visible or be hidden until you click the desktop.
How to Switch Between Apps
Moving between applications is straightforward.
Click any application thumbnail on the left.
The selected app moves to the center, while the previous app returns to the sidebar.
Keyboard shortcuts continue to work normally.
For example:
- Command + Tab switches between applications.
- Command + ` switches between windows within the same application.
Many users combine these shortcuts with Stage Manager rather than relying exclusively on the mouse.
How to Group Windows Together
One of the most useful features is grouping related windows.
Suppose you’re researching a topic using Safari while taking notes in Notes.
Instead of switching back and forth between the two separately, you can place them into the same workspace.
To group windows:
- Turn on Stage Manager.
- Open the applications you want together.
- Drag one app’s thumbnail from the sidebar onto the active workspace.
- Release the mouse.
Both applications now remain together.
This works well for tasks such as:
- Writing while referencing research
- Editing photos alongside Finder
- Coding with Terminal
- Working on spreadsheets while viewing email
- Video editing alongside media folders
When you select that workspace later, both windows return together.
Rearranging Windows Inside a Group
Stage Manager doesn’t lock window positions.
You can still:
- Resize windows
- Move them around
- Place one beside another
- Overlap them
- Maximize individual windows
The organization system simply remembers which windows belong together.
This flexibility makes it easier to create workspaces suited to different projects.
Removing an App From a Group
Sometimes a grouped workspace becomes too crowded.
To remove an application:
- Activate the group.
- Drag the unwanted window away.
- Switch to another app if necessary.
Alternatively, closing the window removes it from the group automatically.
You can always recreate the group later.
Customizing Stage Manager
Stage Manager includes several options that affect how your desktop behaves.
Open:
System Settings → Desktop & Dock
Available settings may include:
Show Recent Apps
This controls whether the left sidebar is always visible.
When enabled:
- The application strip stays on screen.
When disabled:
- The thumbnails stay hidden until you move the pointer toward the left edge.
Hiding the sidebar gives you more horizontal workspace, especially on smaller MacBook displays.
Show Desktop Items
You can choose whether desktop icons remain visible.
If enabled:
- Files and folders remain on the desktop.
If disabled:
- Desktop icons disappear until you click an empty area of the desktop.
Many users prefer hiding desktop items because it creates a cleaner workspace.
Using Stage Manager With Multiple Displays
If your Mac uses two or more monitors, Stage Manager works independently on each display.
Each monitor maintains its own organized workspace.
This allows you to:
- Edit documents on one screen
- Monitor communication apps on another
- Keep reference material visible
- Separate creative work from browser windows
The experience is generally smoother on larger external displays where there is more room for grouped windows.
Using Stage Manager Alongside Split View
Stage Manager and Split View can complement each other.
For example, you can:
- Place Safari and Notes side by side.
- Keep that pair grouped together.
- Switch to another grouped workspace when needed.
This approach combines focused multitasking with fast workspace switching.
It’s especially useful for writing, coding, and research.
Stage Manager vs Mission Control
Although both help manage windows, they solve different problems.
| Feature | Stage Manager | Mission Control |
|---|---|---|
| Organizes windows automatically | Yes | No |
| Shows all open windows | No | Yes |
| Keeps one workspace active | Yes | No |
| Designed for continuous use | Yes | Mainly temporary |
| Supports grouped workspaces | Yes | No |
Mission Control is ideal when you need a quick overview of every open window.
Stage Manager is better if you spend long periods switching between a few recurring tasks.
Many Mac users use both features together instead of choosing only one.
When Stage Manager Works Best
The feature is most helpful when you regularly work with several applications throughout the day.
Common examples include:
- Researching while writing articles
- Editing photos and browsing media folders
- Software development with code editors and Terminal
- Managing spreadsheets while referencing emails
- Graphic design projects involving multiple creative apps
Instead of repeatedly minimizing windows, you simply switch between organized workspaces.
Common Problems and Their Solutions
Stage Manager Is Missing
The most common reason is an unsupported macOS version.
Check whether you’re running Ventura or later.
If you’re using Monterey or an older release, you’ll need to upgrade if your Mac supports it.
Windows Don’t Group Together
Grouping isn’t automatic for unrelated applications.
Drag one application’s thumbnail onto another active workspace to create a group manually.
The Sidebar Keeps Disappearing
Check the Show Recent Apps option.
If it’s disabled, the sidebar only appears when you move your pointer to the left edge of the display.
Desktop Icons Have Disappeared
This usually happens because Show Desktop Items has been turned off.
Re-enable the setting in Desktop & Dock if you want your files visible all the time.
Stage Manager Feels Confusing
It’s normal to need a few days to adjust.
Users who have relied on overlapping windows for years often need some time before the workflow feels natural.
Try using it only during one type of work, such as writing or coding, before making it your default workspace.
Tips for Getting the Most Out of Stage Manager
A few habits can make the feature much more effective.
- Keep only the applications you actually need open.
- Group apps that are used for the same task.
- Close windows you no longer need instead of leaving them in the sidebar.
- Learn keyboard shortcuts like Command + Tab for even faster navigation.
- Combine Stage Manager with multiple desktops if you separate work by projects.
- Hide desktop icons if visual clutter distracts you.
- Use larger external monitors when working with several grouped windows.
Small workflow adjustments often make a bigger difference than changing settings.
Should You Use Stage Manager?
Stage Manager isn’t intended to replace every macOS window management feature.
If you mostly work in one application at a time, you may not notice much benefit.
If you constantly switch between several apps, however, it can significantly reduce the time spent organizing windows. Writers, developers, designers, students, and office workers often benefit because related applications stay grouped together instead of becoming scattered across the desktop.
There’s no downside to trying it. Since it can be enabled or disabled instantly from Control Center, you can experiment with your existing workflow and decide whether it makes your day more organized.
For many Mac users, Stage Manager becomes most valuable after a few days of regular use, once switching between grouped workspaces starts to feel natural.
Related Articles
- How to Clean a MacBook Keyboard Safely
- How to Reset NVRAM on MacBook to Fix Startup Issues
- Why Is My MacBook Running Slow After macOS Update?
- How to Use Split View on Mac for Better Productivity
If you think there’s been a mistake here, please do let us know by commenting on this post or Contact Us. And a member of our Content Integrity Team will review this decision with you.





