

Running out of storage on your Mac usually isn’t caused by apps alone. More often, a handful of large files are quietly consuming tens or even hundreds of gigabytes. Old video projects, virtual machines, iPhone backups, Downloads folders, duplicate installers, and forgotten disk images can accumulate over time without you noticing.
If you’re trying to free up storage, the first step is identifying what’s actually using the space. Once you know where the largest files are located, you can decide whether to delete them, move them to external storage, or archive them for later.
This guide explains several reliable ways to find large files on macOS, from built-in tools to advanced Terminal commands. It also covers what types of files are usually safe to remove, what you should leave alone, and what to do if your storage still doesn’t make sense after cleaning up.
Why Your Mac Fills Up Faster Than You Expect
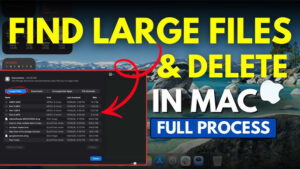
Many people assume applications are responsible for most storage usage. While some apps are large, personal data often grows much faster.
Common examples include:
- 4K videos and screen recordings
- Photos and video libraries
- Downloads that were never deleted
- Virtual machines
- Xcode files and simulators
- iPhone or iPad backups
- Mail attachments
- Disk images (.dmg)
- ZIP archives
- Duplicate files
Some of these files remain hidden in folders you rarely visit, making them easy to forget.
Check Storage Usage Before Looking for Large Files
Before searching individual folders, check how macOS reports storage usage.
- Click the Apple menu.
- Open System Settings.
- Select General.
- Click Storage.
Older versions of macOS display this under About This Mac > Storage.
Give your Mac a minute to analyze the drive. You’ll see categories such as:
- Applications
- Documents
- Photos
- Music
- macOS
- System Data
Although these categories don’t reveal every file, they provide a good starting point. If Documents or System Data occupies an unusually large amount of storage, you’ll know where to focus next.
Use Finder to Search for Large Files
Finder includes a built-in search filter that makes locating large files surprisingly easy.
Search by File Size
- Open Finder.
- Press Command + F.
- Ensure This Mac is selected.
- Click the first dropdown and choose File Size.
- If File Size isn’t available, select Other, search for File Size, and enable it.
- Choose is greater than.
- Enter a value such as:
- 100 MB
- 500 MB
- 1 GB
Finder immediately displays matching files across your Mac.
Switch to List View to compare results more easily, then sort by Size if available.
Save the Search
If you regularly clean up your Mac, click Save in Finder after creating the search.
The saved Smart Folder updates automatically and shows newly created large files in the future.
Find Large Files in the Downloads Folder
The Downloads folder is one of the biggest sources of wasted storage.
Open Downloads and sort files by Size.
Look for:
- Old installers
- ZIP archives
- DMG files
- Duplicate downloads
- Videos
- ISO images
Many installer files remain after software has already been installed. If you’re certain you no longer need them, deleting them can recover several gigabytes.
Use Storage Management Recommendations
macOS includes built-in storage recommendations that identify files you may no longer need.
Go to:
System Settings → General → Storage
Depending on your macOS version, you’ll see suggestions such as:
- Review Files
- Reduce Clutter
- Store in iCloud
- Empty Trash Automatically
- Optimize Storage
The Review Files section often lists large documents, downloaded files, and unsupported applications.
This method is especially useful if you want a guided cleanup rather than manually searching folders.
Find Large Files Using Terminal
If you’re comfortable using Terminal, it provides one of the fastest ways to identify the biggest files on your Mac.
Open Terminal and run:
find ~ -type f -size +500MThis searches your home folder for files larger than 500 MB.
To search the entire startup drive:
sudo find / -type f -size +1GYou’ll be prompted for your administrator password.
Searching the entire disk may take several minutes, especially on larger SSDs.
Display the Largest Files
To list the biggest files in descending order:
find ~ -type f -exec du -h {} + | sort -hr | head -20This displays the twenty largest files in your home directory.
It’s a practical option if you want to identify storage hogs quickly without browsing multiple folders.
Use the du Command to Find Large Folders
Sometimes the problem isn’t one large file but an entire folder.
Run:
du -sh ~/*This shows the size of each top-level folder in your home directory.
For a more detailed breakdown:
du -sh ~/Downloads/*You can quickly determine which folders deserve closer inspection.
Common Locations Where Large Files Hide
Certain folders consistently consume more storage than users expect.
| Folder | What You Might Find |
|---|---|
| Downloads | Installers, ZIP files, videos |
| Movies | Screen recordings, imported videos |
| Pictures | Photos Library, edited images |
| Music | Audio libraries, podcasts |
| Documents | Large PDFs, archives, project files |
| Desktop | Forgotten downloads and media |
| Library/Application Support | App data and caches |
| MobileSync | iPhone backups |
Checking these locations often reveals files that haven’t been opened in months or years.
Locate Large iPhone and iPad Backups
Local backups created by Finder can become surprisingly large.
They are usually stored in:
~/Library/Application Support/MobileSync/BackupIf you have several backups from older devices, deleting outdated ones can recover a significant amount of storage.
Before removing them, make sure you no longer need those backups for restoring a device.
Find Large Photos and Video Libraries
Media libraries are among the largest files on most Macs.
Look for:
- Photos Library.photoslibrary
- Final Cut Pro libraries
- iMovie libraries
- Adobe Premiere project folders
- DaVinci Resolve cache folders
A single Photos Library can exceed 100 GB, while professional video editing projects may occupy several hundred gigabytes.
If you work with media regularly, consider moving completed projects to an external SSD.
Check for Old Virtual Machines
Virtual machines consume large amounts of disk space because each one stores an entire operating system.
Look for folders created by:
- Parallels Desktop
- VMware Fusion
- UTM
- VirtualBox
Even unused virtual machines often remain on the drive long after you’ve stopped using them.
If you no longer need one, delete it through the virtualization software whenever possible rather than removing files manually.
Look for Duplicate Disk Images and Installers
Many Macs accumulate duplicate installation files over time.
Examples include:
- macOS installers
- Office installers
- Adobe installers
- Game installers
- Linux ISO files
- Windows ISO files
Search Finder for:
.dmg
.iso
.pkg
If you’ve already installed the software and don’t plan to reinstall it soon, these files are generally safe to delete.
What Files Should You Avoid Deleting?
Not every large file should be removed.
Avoid deleting:
- Files inside the System folder
- Unknown files in Library
- Hidden system components
- Application support files unless you understand their purpose
- Virtual memory files
- macOS recovery files
Deleting the wrong system file can cause software to malfunction or prevent macOS from working correctly.
When in doubt, research the file before removing it.
What to Do After Finding Large Files
Finding the files is only the first step. Decide how valuable they are before deleting anything.
Your options include:
- Delete files you no longer need.
- Move important files to an external drive.
- Archive old projects.
- Upload files to cloud storage if appropriate.
- Compress files that are rarely accessed.
Empty the Trash afterward to actually recover the storage space.
Many users forget this final step and wonder why available storage hasn’t changed.
Why Storage Doesn’t Increase After Deleting Files
Sometimes storage appears unchanged even after removing several gigabytes.
Possible reasons include:
Trash Hasn’t Been Emptied
Deleted files remain in the Trash until it’s emptied.
Spotlight Is Updating
macOS may need several minutes to recalculate storage after major changes.
System Data Is Still Growing
System Data includes:
- Caches
- Logs
- Local snapshots
- Temporary files
Some of this storage decreases automatically over time.
Time Machine Local Snapshots
If Time Machine is enabled, macOS creates temporary local snapshots when your backup drive isn’t connected.
These snapshots can consume dozens of gigabytes but are automatically removed when storage becomes limited.
Tips to Prevent Storage Problems
A little routine maintenance goes a long way.
Good habits include:
- Empty Downloads regularly.
- Remove installers after use.
- Delete unused virtual machines.
- Review large files every month.
- Store completed video projects externally.
- Clear unnecessary iPhone backups.
- Empty the Trash frequently.
- Keep at least 10 to 20 percent of your SSD free to help macOS perform efficiently.
These habits reduce the chances of unexpectedly running out of storage.
Troubleshooting When You Still Can’t Find What’s Using Space
If Finder and Storage settings don’t explain where your storage has gone, try these checks:
- Restart your Mac to clear temporary storage reports.
- Allow Storage settings to finish indexing.
- Boot into Safe Mode and restart normally.
- Check for unusually large cache folders.
- Verify that Time Machine snapshots aren’t consuming significant space.
- Use Terminal commands to inspect folders individually if Storage categories seem inaccurate.
In rare cases, storage reporting can lag behind actual disk usage, especially after deleting very large files.
Final Thoughts
Finding large files taking up space on a Mac is usually easier than people expect once you know where to look. Finder’s search filters, the Storage settings panel, and Terminal commands can quickly reveal the files and folders consuming the most space.
After identifying them, take a moment to decide whether each file should be deleted, archived, or moved to external storage. Avoid removing system files unless you’re certain they’re safe, and remember to empty the Trash so macOS can reclaim the space.
Making a habit of reviewing your largest files every few weeks helps keep your Mac organized, improves available storage, and reduces the chances of running into low disk space when you need it most.
Related Articles
- How to Check MacBook Battery Cycle Count
- How to Fix Finder Not Responding on Mac
- How to Free Up Storage on MacBook Without Deleting Important Files
- Why Is My MacBook Running Slow After macOS Update?
If you think there’s been a mistake here, please do let us know by commenting on this post or Contact Us. And a member of our Content Integrity Team will review this decision with you.





