

Deleting an important file on your MacBook can be stressful, especially if you never enabled Time Machine. The good news is that losing a file doesn’t always mean it’s gone forever.
In many cases, deleted files remain on the storage drive until new data overwrites them. That gives you a window of opportunity to recover them using built-in macOS features, cloud services, professional recovery software, or backups you may have forgotten about.
The best recovery method depends on how the file was deleted, how long ago it disappeared, and whether your MacBook uses an Intel processor or Apple silicon. Acting quickly is the most important step because continued use of the Mac increases the chance that deleted data will be overwritten.
This guide explains every practical way to recover deleted files from a MacBook without Time Machine, including when each method works, its limitations, and what to do if the file cannot be recovered.
Understand Whether Your File Is Actually Deleted
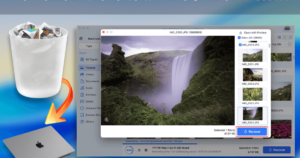
Before attempting file recovery, determine how the file disappeared.
A file may have been:
- Moved to the Trash
- Permanently deleted from the Trash
- Removed using Command + Delete
- Deleted with Terminal commands
- Lost after a macOS update
- Disappeared because of iCloud synchronization
- Hidden due to Finder settings
- Lost because of drive corruption
Knowing what happened helps narrow down the best recovery method and avoids wasting time on solutions that cannot work in your situation.
Stop Using Your MacBook Immediately
If the file was permanently deleted, avoid downloading software, copying files, or installing macOS updates until recovery is complete.
Modern versions of macOS continuously write temporary files, logs, browser cache, and application data. Every write operation increases the possibility that the deleted file’s storage blocks will be reused.
If possible:
- Save no new files.
- Avoid editing documents.
- Do not install recovery software on the same drive you’re recovering from.
- If available, use another Mac to create a recovery USB drive or install recovery software onto an external drive.
This simple precaution can significantly improve the chances of successful recovery.
Check the Trash First
It sounds obvious, but many users skip this step.
Open the Trash from the Dock and carefully look through its contents. Finder sometimes sorts files differently than expected, so use the search bar if you remember part of the filename.
If you find the file:
- Right-click it.
- Select Put Back.
The file returns to its original location.
If you emptied the Trash, continue with the recovery methods below.
Search Your Mac Thoroughly
Sometimes files aren’t deleted at all. They may have been moved accidentally.
Try these approaches:
Use Spotlight Search
Press Command + Space and type:
- the full filename
- part of the filename
- the file extension
- keywords contained inside the document
Spotlight indexes most user files and often finds documents even after they’ve been relocated.
Search in Finder
Open Finder.
Choose:
File > Find
Search by:
- Name
- Kind
- Date Modified
- Tags
- File Extension
This method often finds documents stored inside unexpected folders.
Look in Recently Opened Files
Many applications maintain their own recent file history.
Examples include:
- Pages
- Microsoft Word
- Preview
- Adobe applications
- Excel
- Keynote
Even if the file moved, the application’s recent list may reveal its new location.
Check iCloud Drive
Many MacBook users unknowingly save documents inside iCloud Drive instead of local storage.
Open Finder and select iCloud Drive.
Check:
- Desktop
- Documents
- Downloads
- Recently Deleted (through iCloud if supported for that data type)
If iCloud syncing experienced a conflict, the missing file may still exist online or on another Apple device connected to the same Apple Account.
Also inspect the iCloud Drive folders on your iPhone or iPad if you use one.
Recover From Recently Deleted Folders
Several Apple apps include their own recovery folders independent of Time Machine.
These include:
- Photos
- Notes
- Files
- Voice Memos
For example, deleted photos remain in Recently Deleted for around 30 days before permanent removal.
If your missing file belongs to one of these apps, check its built-in recovery folder before trying data recovery software.
Restore Files From Cloud Storage Services
Even if you never used Time Machine, you might have another backup without realizing it.
Check services such as:
- iCloud Drive
- Google Drive
- Dropbox
- OneDrive
- Box
Many cloud providers retain deleted files for several weeks.
Most offer a web-based recycle bin where deleted files can be restored with a few clicks.
This method is especially useful if Finder no longer shows the file locally.
Use Data Recovery Software
If the file has been permanently deleted and no backup exists, recovery software offers the highest chance of success.
These applications scan the drive for deleted data that macOS no longer lists in Finder.
Recovery is most successful when:
- the deletion happened recently
- the drive has seen little use afterward
- the deleted sectors have not been overwritten
Popular Mac Recovery Applications
Several well-established recovery tools support modern versions of macOS.
Common options include:
| Software | Best For | Notes |
|---|---|---|
| Disk Drill | General file recovery | Beginner-friendly interface |
| EaseUS Data Recovery Wizard | Mixed file types | Good recovery previews |
| Stellar Data Recovery | Photos and documents | Multiple recovery modes |
| PhotoRec | Advanced users | Free but command-line oriented |
No recovery application can guarantee success. If the storage blocks have already been overwritten, recovery may be impossible regardless of the software used.
Install Recovery Software Carefully
Avoid installing the software onto the same internal drive containing the deleted file.
Instead:
- Download the installer using another computer if possible.
- Install it onto an external SSD or USB drive.
- Connect the external drive to the MacBook.
- Scan the internal drive.
- Save recovered files onto another external drive.
Saving recovered files back onto the original drive risks overwriting additional recoverable data.
Recover Files From an External Backup
Many users manually copy files to external drives instead of using Time Machine.
Check:
- USB flash drives
- External SSDs
- Portable hard drives
- NAS storage
- Home servers
Even an old project folder may contain the missing document.
If you regularly transfer photos or work files manually, this recovery method can be surprisingly effective.
Use Terminal Only if You Know the File Still Exists
Terminal cannot magically recover permanently deleted files.
However, it can help locate hidden files or verify whether files still exist.
For example, Finder occasionally hides files due to permissions or display settings.
Advanced users can inspect directories using Terminal, but if the file has already been removed from the file system, Terminal alone cannot restore it.
Be cautious with Terminal commands because incorrect commands may permanently erase additional data.
Recover Files After a Formatted Drive
If an external drive connected to your MacBook was accidentally formatted, stop using it immediately.
Formatting often removes the file system index rather than immediately erasing every file.
Recovery software may still reconstruct:
- photos
- videos
- documents
- archives
- project files
Recovery success depends largely on whether new files have been written after formatting.
Recover Files From an APFS Drive
Most modern MacBooks use Apple’s APFS file system.
APFS handles storage differently from older HFS+ drives.
Some important characteristics include:
- snapshots
- copy-on-write technology
- encryption support
- optimized SSD performance
These features improve reliability but also make deleted file recovery more complex.
Professional recovery software designed specifically for APFS generally performs better than older recovery tools that were originally built for HFS+.
What If FileVault Is Enabled?
Many MacBooks have FileVault enabled by default.
FileVault encrypts the storage drive to protect your data.
This does not prevent recovery software from scanning the drive if:
- you know your login password
- the drive remains unlocked
However, if the drive becomes corrupted and the encryption keys are unavailable, recovery becomes significantly more difficult.
Common Mistakes That Reduce Recovery Success
People often make recovery harder without realizing it.
Avoid these mistakes:
- Continuing to use the Mac normally
- Installing recovery software onto the affected drive
- Saving recovered files back to the same disk
- Running unnecessary disk cleanup tools
- Reinstalling macOS before attempting recovery
- Assuming every recovery program produces identical results
The sooner you begin recovery, the better your chances.
When Professional Data Recovery Is Worth Considering
Software recovery cannot solve every problem.
Professional recovery services become worthwhile when:
- the SSD is physically damaged
- the MacBook no longer powers on
- liquid damage occurred
- the drive is unreadable
- the deleted data is extremely valuable
Professional laboratories have specialized equipment capable of recovering data that consumer software cannot access.
However, these services can be expensive, and success is never guaranteed.
What to Do if Recovery Fails
Sometimes deleted files simply cannot be recovered.
This usually happens because:
- new data overwrote the deleted sectors
- secure deletion occurred
- the SSD’s garbage collection permanently removed the data
- TRIM erased unused blocks
- severe hardware damage destroyed the storage
If recovery software finds nothing, avoid repeatedly scanning the drive with different tools expecting different results. Multiple scans rarely recover overwritten data.
Instead, check older email attachments, shared folders, messaging apps, cloud services, collaborators, or archived project copies. Many documents survive in places people forget to look.
How to Prevent Future Data Loss
Recovering deleted files is never guaranteed, so prevention is far more reliable.
A good backup strategy includes more than one copy of important files.
Consider these practices:
- Enable Time Machine with an external drive.
- Keep important work in iCloud Drive or another trusted cloud storage service.
- Store an additional backup on an external SSD.
- Back up before major macOS upgrades.
- Verify backups periodically instead of assuming they are working.
- Use version history in cloud storage when available.
- Avoid keeping your only copy of important documents on your MacBook.
Following these habits means a mistaken deletion becomes a minor inconvenience instead of a disaster.
Final Thoughts
Recovering deleted files from a MacBook without Time Machine is often possible, but the outcome depends on how the files were deleted and how quickly you act afterward. Start with the simplest methods by checking the Trash, searching Finder, and reviewing cloud storage or application-specific recovery folders.
If those options fail, reputable data recovery software offers the best chance of restoring permanently deleted files, provided they have not been overwritten.
If the MacBook has suffered hardware damage or the lost files are irreplaceable, professional recovery services may be the safest option. Once you’ve recovered your data, setting up regular backups with Time Machine and a cloud service is the most effective way to avoid facing the same situation again.
Related Articles
- How to Stop MacBook From Sleeping When Downloading Files
- How to Reset MacBook SMC and When You Should Do It
- How to Reset NVRAM on MacBook to Fix Startup Issues
- Common MacBook Problems and How to Fix Them
If you think there’s been a mistake here, please do let us know by commenting on this post or Contact Us. And a member of our Content Integrity Team will review this decision with you.





