

A MacBook that won’t charge can quickly interrupt your work, but the cause isn’t always a failed battery or expensive hardware repair. In many cases, charging problems are caused by something much simpler, such as a damaged charging cable, debris inside the charging port, software glitches, battery management features, or even a power outlet that isn’t supplying enough electricity.
The best way to troubleshoot MacBook charging problems is to start with the simplest checks before moving to more advanced solutions.
This approach saves time, avoids unnecessary repairs, and helps you identify whether the issue is related to your charger, battery, macOS, or the MacBook itself.
This guide walks through every practical troubleshooting step, explains why each one works, and helps you understand when the problem is something you can fix yourself and when it’s time to seek professional service.
Understand the Symptoms Before You Start
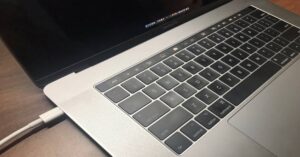
Not every charging issue looks the same. Identifying the exact symptom makes troubleshooting much easier.
Common charging problems include:
- The MacBook doesn’t charge at all.
- The battery percentage stays the same even though the charger is connected.
- Charging starts and stops repeatedly.
- The battery charges very slowly.
- The MacBook only charges when turned off.
- The charging indicator doesn’t appear.
- The battery says “Not Charging.”
- The MagSafe LED doesn’t light up.
- USB-C chargers work intermittently.
Some of these symptoms point to hardware issues, while others are caused by software settings or normal battery protection features.
Check the Power Source First
It sounds obvious, but power outlets are responsible for more charging issues than many people expect.
Before assuming your MacBook has a fault:
- Plug another device into the same outlet.
- If you’re using a power strip, plug the charger directly into the wall.
- Try another outlet in a different room.
- Ensure any surge protector is switched on.
- If you’re traveling internationally, verify that your adapter supports the local voltage.
A charger cannot compensate for an unstable or faulty power source.
Inspect the Charger Carefully
Apple chargers are durable, but they are not immune to wear.
Look for:
- Frayed insulation
- Bent connector pins
- Burn marks
- Loose USB-C connector
- Exposed wiring
- Cracked charging brick
Even minor cable damage can interrupt charging.
If your cable feels unusually hot or only works at certain angles, it should be replaced.
Verify You’re Using the Correct Charger
One common reason for slow charging is using an adapter with insufficient power.
Modern MacBooks require different wattages depending on the model.
| MacBook | Typical Charger |
|---|---|
| MacBook Air | 30W to 35W |
| 13-inch MacBook Pro | 61W |
| 14-inch MacBook Pro | 67W, 70W, or 96W |
| 16-inch MacBook Pro | 140W |
Using a lower-wattage charger usually won’t damage your MacBook, but charging may be extremely slow or stop altogether while the computer is under heavy load.
Third-party chargers should support USB Power Delivery (USB-PD) and provide enough wattage for your specific model.
Check the Charging Port
Dust, lint, and debris frequently prevent proper electrical contact.
For USB-C MacBooks:
- Shine a flashlight into each port.
- Look for lint, dirt, or bent contacts.
- Remove loose debris using compressed air.
- Never insert metal objects into the port.
For MagSafe models:
Inspect both the connector and the charging port.
MagSafe connectors rely on magnetic alignment. Metal particles can interfere with the connection.
If the connector does not sit flush against the MacBook, clean both surfaces carefully with a dry microfiber cloth.
Try Another USB-C Port
If your MacBook has multiple USB-C ports, test each one individually.
A damaged port may stop charging while the others continue to work normally.
If charging only works on one side of the MacBook, the issue may involve:
- A damaged USB-C port
- Internal logic board circuitry
- Physical connector wear
This information is useful if professional repair becomes necessary.
Check Battery Status in macOS
macOS provides useful information about battery health.
To check it:
- Open System Settings.
- Select Battery.
- Open Battery Health.
Depending on your version of macOS, you may see:
- Normal
- Service Recommended
A “Service Recommended” message usually means the battery has deteriorated enough that replacement should be considered.
Remember that batteries naturally lose capacity over time. This does not necessarily mean the MacBook is unsafe to use.
Understand the “Not Charging” Message
Many users assume this message means something is broken.
Often, it does not.
macOS includes battery protection features designed to reduce long-term wear.
The MacBook may temporarily stop charging when:
- Battery Optimized Charging is active.
- The battery temperature is too high.
- The system predicts you’ll remain plugged in for an extended period.
- The battery is already near full capacity.
If the battery percentage stays stable and eventually resumes charging, this behavior is usually normal.
Restart Your MacBook
Software processes occasionally interfere with battery management.
Restarting clears temporary issues and reloads hardware drivers.
To restart:
- Save your work.
- Open the Apple menu.
- Select Restart.
- Allow the MacBook to reboot completely.
After restarting, reconnect the charger.
If charging resumes normally, the issue was likely temporary.
Update macOS
Apple regularly releases updates that improve battery management, charging reliability, and hardware compatibility.
To check for updates:
- Open System Settings.
- Select General.
- Choose Software Update.
- Install any available updates.
Updating is particularly important if charging issues began shortly after upgrading accessories or connecting new peripherals.
Reduce Power Consumption While Testing
A heavily loaded MacBook can consume power faster than a low-wattage charger supplies it.
This creates the impression that charging isn’t working.
During testing:
- Close demanding applications.
- Disconnect external displays.
- Stop video rendering.
- Pause gaming.
- Disconnect unused USB devices.
If battery percentage begins increasing afterward, your charger may simply be undersized for your workload.
Allow the MacBook to Cool Down
Heat affects lithium-ion batteries.
If your MacBook becomes too warm, charging may slow or stop temporarily to protect the battery.
Common causes include:
- Direct sunlight
- Gaming
- Video editing
- Poor ventilation
- Charging under blankets or pillows
Move the MacBook to a cooler location and allow it to return to normal temperature before testing again.
Avoid placing it in a refrigerator or using artificial cooling methods.
Disconnect Accessories
External devices share power with your MacBook.
Disconnect:
- USB hubs
- External drives
- Docking stations
- Portable monitors
- USB-powered accessories
Then reconnect only the charger.
If charging improves, one of the connected devices may be drawing excessive power or causing communication issues.
Reset Battery Management Components
Some older Intel-based MacBooks include a controller responsible for power management.
Resetting it can resolve charging problems that software troubleshooting does not.
The process varies depending on:
- Intel MacBook with T2 Security Chip
- Intel MacBook without T2
- Apple silicon MacBooks
Apple silicon models do not have a separate System Management Controller (SMC) reset procedure. A normal shutdown followed by restarting the Mac usually performs the required initialization.
If you own an Intel MacBook, make sure you follow the reset procedure designed specifically for your model, as the key combinations differ.
Test with Another Charger
One of the fastest ways to isolate the problem is to borrow a compatible charger.
Possible outcomes include:
- Another charger works normally: your original charger or cable is faulty.
- Neither charger works: the problem is probably inside the MacBook.
- Both chargers work intermittently: the charging port may be damaged.
Testing another charger often eliminates hours of unnecessary troubleshooting.
Check Battery Cycle Count
Battery age matters.
Every MacBook battery has a limited number of charging cycles before capacity gradually decreases.
To view cycle count:
- Hold the Option key.
- Open the Apple menu.
- Select System Information.
- Choose Power.
- Find Cycle Count.
A high cycle count doesn’t automatically mean charging problems will occur, but it does indicate battery wear.
Combined with poor battery health, it may explain reduced charging performance.
Watch for Signs of Hardware Failure
Some symptoms suggest a hardware problem rather than a software issue.
These include:
- Battery swelling
- Charger becoming extremely hot
- Burning smell
- Visible liquid damage
- Sparks near the charging port
- Random shutdowns while connected to power
- Charging only after pressure is applied to the connector
Stop using the charger immediately if you notice any of these signs.
Continuing to use damaged charging equipment can increase the risk of further hardware damage.
Troubleshoot Slow Charging
Slow charging isn’t always a fault.
Your MacBook may charge slowly because:
- You’re using a lower-wattage charger.
- Battery temperature is high.
- CPU usage is extremely high.
- External displays increase power consumption.
- Multiple USB devices are connected.
- Battery optimization temporarily limits charging speed.
To improve charging speed:
- Use the original charger whenever possible.
- Close resource-intensive apps.
- Disconnect unnecessary accessories.
- Allow the MacBook to cool.
- Charge with the lid closed if you don’t need to use it.
Common Mistakes That Can Delay the Fix
Many users accidentally make troubleshooting harder.
Avoid these mistakes:
- Assuming the battery is defective without testing the charger.
- Ignoring damaged cables.
- Using very low-quality third-party chargers.
- Cleaning ports with metal tools.
- Continuing to use swollen batteries.
- Installing unnecessary “battery optimization” utilities.
- Replacing the battery before checking software issues.
Working through the troubleshooting steps in order helps you avoid replacing parts that aren’t actually faulty.
When Professional Repair Is the Right Choice
Home troubleshooting has limits.
Professional diagnosis is recommended if:
- The MacBook never detects any charger.
- Multiple known-good chargers fail.
- Battery health reports “Service Recommended” and runtime has become very poor.
- Liquid has entered the MacBook.
- The charging port is physically damaged.
- The battery is swollen.
- The MacBook shuts down immediately after disconnecting power.
Technicians can test the charging circuitry, battery, USB-C controller, and logic board using diagnostic equipment that isn’t available to most users.
Prevent Future Charging Problems
A few simple habits can help extend both battery life and charging reliability.
- Use quality chargers that meet your MacBook’s power requirements.
- Avoid tightly wrapping cables around the power adapter.
- Keep charging ports clean.
- Prevent liquids from reaching the keyboard and ports.
- Keep macOS updated.
- Store the MacBook in a cool, dry environment.
- Avoid exposing the battery to excessive heat for long periods.
- Replace damaged charging cables promptly instead of continuing to use them.
These habits reduce wear on both the charging system and the battery.
Final Thoughts
Learning how to troubleshoot MacBook charging problems starts with ruling out the simple causes before assuming the worst. A faulty outlet, worn cable, blocked charging port, or software-related battery protection feature is often responsible for charging issues that seem much more serious.
By checking the power source, inspecting the charger, testing different ports, reviewing battery health, updating macOS, and understanding how Apple’s charging system works, you can identify many problems without replacing parts unnecessarily.
If your MacBook still refuses to charge after these steps, or you notice signs such as battery swelling, liquid damage, or physical damage to the charging port, professional diagnosis is the safest next step. Following a methodical process not only saves time but also helps protect your MacBook from avoidable damage.
Related Articles
- How to Improve MacBook Startup Speed
- How to Recover Deleted Files From MacBook Without Time Machine
- How to Use Stage Manager on macOS
- How to Fix MacBook Microphone Not Working
If you think there’s been a mistake here, please do let us know by commenting on this post or Contact Us. And a member of our Content Integrity Team will review this decision with you.





