

Replacing a hard drive with an SSD is one of the best upgrades you can make for a Windows PC. The problem is that reinstalling Windows, setting up programs again, restoring files, and reconfiguring settings can take hours or even days.
Fortunately, you can clone Windows to an SSD without reinstalling everything by copying your existing system drive to the new SSD.
Windows cloning creates an exact copy of your current installation, including the operating system, installed applications, user accounts, settings, files, and boot information.
After cloning, you can replace the old drive with the SSD and continue using your computer almost exactly as before.
However, cloning is not as simple as copying files from one drive to another. A successful migration requires choosing the right cloning method, preparing both drives correctly, and making sure Windows can boot from the new SSD afterward.
This guide explains how Windows cloning works, what you need before starting, the safest methods to clone your system, and how to fix common problems if the SSD does not boot.
What Happens When You Clone Windows to an SSD?
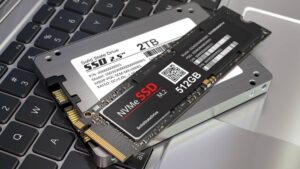
A Windows clone creates a complete copy of your existing system drive. Instead of installing Windows from scratch, cloning transfers the entire disk structure to the SSD.
A proper clone usually includes:
- Windows system files
- Installed applications
- Personal files
- Windows settings
- User profiles
- Recovery partitions
- Boot files required to start Windows
After the process finishes, the SSD should behave like your old drive. Your desktop layout, installed software, browser settings, and saved files should remain unchanged.
The main difference is performance. An SSD can significantly improve startup times, application loading, file transfers, and overall system responsiveness compared with a traditional hard disk drive.
Cloning is different from simply copying your files. Dragging your Windows folder or copying documents to the SSD will not create a bootable Windows installation because Windows depends on hidden partitions, boot configuration data, and system-specific settings.
Before You Clone Windows to an SSD
A little preparation prevents most cloning failures. Before starting, check your current drive, SSD capacity, and connection method.
Check SSD Capacity
The SSD should have enough usable space for the data currently stored on your Windows drive.
You do not necessarily need an SSD as large as your old drive. For example, if your old 1TB hard drive contains only 300GB of used data, a 500GB SSD may be enough.
To check your used space:
- Open File Explorer.
- Select This PC.
- Right-click your Windows drive, usually labeled C:.
- Select Properties.
- Check the amount of used space.
If the SSD is smaller than your current drive, the cloning software must support resizing partitions. You may also need to remove unnecessary files first.
Before cloning, consider deleting:
- Temporary files
- Large downloads you no longer need
- Old backups
- Unused applications
- Large media files stored elsewhere
Reducing the amount of data makes the cloning process faster and lowers the chance of errors.
Connect the SSD Correctly
How you connect the SSD depends on your computer.
For desktop computers, you can usually install the SSD internally using a SATA cable or an available M.2 slot.
For laptops, common options include:
- Installing the SSD internally and cloning before replacement
- Using a USB-to-SATA adapter
- Using an external NVMe enclosure for M.2 SSDs
The cloning software must be able to detect both drives at the same time. If the SSD does not appear in Windows Disk Management or the cloning program, check the connection before continuing.
Back Up Important Files
Although cloning is generally safe, drive operations always carry some risk.
A cloning mistake, power failure, or hardware problem could result in data loss. Keep a separate backup of important documents, photos, work files, and anything you cannot replace.
A clone is a migration tool, not a substitute for regular backups.
Choose a Windows Cloning Tool
Windows does not include a built-in tool for cloning the operating system, so you need third-party cloning software.
Popular options include:
- Manufacturer migration software provided with some SSDs
- Dedicated disk cloning applications
- Backup programs with disk cloning features
Many SSD manufacturers provide free migration utilities designed specifically for moving Windows to their drives. These tools are often the easiest option because they automatically handle SSD alignment and boot partitions.
When choosing cloning software, look for features such as:
- System disk cloning
- Partition resizing
- GPT and UEFI support
- Boot repair options
- SSD optimization
Avoid unknown cloning programs from unreliable sources. Disk cloning software operates at a low level and can affect your entire storage device.
How to Clone Windows to SSD Without Reinstalling Everything
The exact buttons vary between cloning programs, but the overall process is similar.
Step 1: Install and Initialize the SSD
Connect the SSD to your computer and make sure Windows detects it.
To check:
- Press Windows + X.
- Select Disk Management.
- Locate the new SSD.
If Windows asks you to initialize the disk, choose the same partition style used by your current system.
Most modern Windows 10 and Windows 11 computers use:
- GPT for UEFI-based systems
- MBR for older legacy BIOS systems
Choosing the wrong format can create boot problems later.
Step 2: Start the Cloning Process
Open your cloning software and select your current Windows drive as the source disk.
The source drive is the drive you are copying from. This is usually the disk containing:
- The Windows partition
- EFI boot partition
- Recovery partition
Then select the SSD as the destination disk.
Be careful here. The destination drive will usually be erased during cloning.
Double-check the drive names and capacities before starting. Selecting the wrong destination can overwrite valuable data.
Step 3: Adjust Partition Size if Needed
If the SSD is larger than your current drive, many cloning tools allow you to expand the Windows partition to use the additional space.
If the SSD is smaller, the cloning software may need to shrink the existing partitions automatically.
For example:
- Old drive: 1TB HDD with 250GB used space
- New SSD: 500GB
The cloning software can usually move the Windows installation and create a smaller partition layout.
However, if the old drive contains more data than the SSD can hold, cloning will fail until you remove files or choose a larger SSD.
Step 4: Begin the Clone
Start the cloning process and wait for it to complete.
The time required depends on:
- Amount of data being copied
- Drive speed
- USB connection speed
- Computer performance
A system with 200GB of data may finish in less than an hour, while larger drives can take several hours.
Avoid using the computer heavily during cloning. Writing new files while the clone is running can create inconsistencies between the old drive and the new SSD.
Step 5: Make the SSD the Boot Drive
After cloning finishes, Windows still starts from the old drive unless you change the boot order or replace the drive.
You have two common options.
Option 1: Replace the Old Drive
This is the simplest approach for laptops and many desktops.
- Shut down the computer completely.
- Disconnect the old drive.
- Install the cloned SSD in its place.
- Turn the computer on.
If the clone was successful, Windows should boot normally.
Option 2: Change Boot Priority
If both drives remain connected:
- Restart the computer.
- Enter BIOS or UEFI settings.
- Open the boot menu.
- Select the SSD as the first boot device.
- Save changes and restart.
The key combination varies by manufacturer. Common keys include:
- F2
- F10
- F12
- Delete
- Esc
What to Do If the SSD Does Not Boot After Cloning
A cloned Windows installation may fail to start even when the data copied correctly. Most boot issues are caused by missing boot files, incorrect boot mode, or partition problems.
Check Whether the SSD Is Detected
First, confirm that the computer sees the SSD.
If the SSD does not appear in BIOS or UEFI:
- Check the physical connection.
- Try another cable or USB adapter.
- Confirm the SSD is compatible with your system.
For M.2 SSDs, make sure the drive is installed in a slot that supports the correct type of SSD.
Repair Windows Boot Files
If the SSD appears but Windows will not load, the boot configuration may need repair.
You can use Windows installation media:
- Boot from a Windows USB installer.
- Select Repair your computer.
- Choose Troubleshoot.
- Open Startup Repair.
Windows will attempt to rebuild the boot information automatically.
If automatic repair fails, advanced recovery tools such as Command Prompt can rebuild boot files manually.
Check UEFI and Legacy BIOS Settings
A common cloning mistake is moving a Windows installation between different boot modes.
For example:
- Original system uses UEFI with GPT
- BIOS is configured for Legacy mode
Windows may not start because the firmware is looking for boot files in the wrong format.
Check your BIOS settings and match them to the original installation.
Common Problems When Cloning Windows to an SSD
The SSD Is Smaller Than the Original Drive
A smaller SSD is often fine, but only if the amount of used data fits.
A common mistake is comparing drive capacity instead of actual data usage.
A 500GB SSD can replace a 1TB hard drive if Windows and your files use less than 500GB.
The Clone Completes but Windows Runs Slowly
After migration, Windows may need time to optimize for the SSD.
Check that:
- The SSD is connected using the fastest available interface.
- AHCI mode is enabled if appropriate.
- SSD firmware is updated.
- Windows recognizes the drive as an SSD.
You can confirm Windows sees the drive correctly by opening Optimize Drives and checking the media type.
The Old Drive and SSD Have the Same Disk Identifier
Rarely, keeping both cloned drives connected can confuse Windows because both drives contain identical system information.
If Windows behaves strangely with both drives installed, shut down and disconnect the old drive. Once Windows starts from the SSD, you can reconnect and format the old drive if needed.
The SSD Has Less Available Space Than Expected
Some cloning tools copy hidden recovery partitions and reserved system partitions. These are necessary for Windows recovery and boot functions.
If the SSD has limited capacity, review the partition layout carefully before cloning.
Do not delete system partitions unless you understand their purpose.
Cloning vs Clean Installing Windows on an SSD
Cloning is not always the best choice.
A clone is ideal when:
- Your current Windows installation works correctly.
- You want to keep your programs and settings.
- You want the fastest migration process.
A clean installation may be better when:
- Windows has years of accumulated software and errors.
- You suspect malware or corruption.
- You want a fresh start.
- You are changing major hardware components.
A clean install takes longer because you must reinstall applications and restore files, but it can provide a cleaner system.
For many users upgrading from an HDD to an SSD, cloning offers the best balance between convenience and preserving their existing setup.
Tips for a Successful Windows SSD Migration
Before starting:
- Connect the computer to reliable power.
- Close unnecessary applications.
- Disable automatic sleep during cloning.
- Use a trusted cloning program.
- Keep a backup of important files.
After cloning:
- Verify that Windows boots from the SSD.
- Confirm your applications open correctly.
- Check that personal files are available.
- Keep the old drive untouched until you are confident everything works.
Do not immediately erase your old drive. Keeping it available for a few days gives you a safety net if something was missed during migration.
Frequently Asked Questions
Can I clone Windows to an SSD without losing programs?
Yes. A proper disk clone transfers installed programs, settings, user accounts, and Windows files to the SSD. You should not need to reinstall applications afterward.
Do I need to reinstall Windows after replacing my hard drive with an SSD?
No. If you clone your existing Windows installation correctly, you can move it to the SSD without reinstalling Windows.
Can I clone Windows 11 to an SSD?
Yes. Windows 11 can be cloned to an SSD. The process is similar to Windows 10, but make sure the cloned drive supports your system’s UEFI and GPT configuration.
How long does cloning Windows to an SSD take?
The time depends mainly on how much data is being copied and the connection speed. Small system drives may finish quickly, while large drives can take several hours.
Will my Windows license still work after cloning?
In most cases, yes. If Windows is activated using a digital license tied to your hardware, cloning the drive usually does not affect activation. Major hardware changes can sometimes trigger activation checks.
Final Thoughts
Cloning Windows to an SSD without reinstalling everything is one of the easiest ways to upgrade storage while keeping your existing setup.
The process preserves your applications, files, and settings while giving you the speed benefits of modern SSD storage.
The most important steps are choosing reliable cloning software, preparing the SSD correctly, selecting the right source and destination drives, and checking boot settings after migration.
If your current Windows installation is stable and you simply want a faster drive, cloning is usually the most practical solution.
A careful migration can save hours of setup work and make your computer feel like a new machine without starting over.
Related Articles
- How to Fix External Hard Drive Not Showing Up in Windows 11
- Fix Windows Activation Error 0x8007007B Step by Step
- Fix USB Device Not Recognized After Windows Update: Causes and Solutions That Work
- Best Free Tools to Check SSD Health in Windows
If you think there’s been a mistake here, please do let us know by commenting on this post or Contact Us. And a member of our Content Integrity Team will review this decision with you.




This Post Has 2 Comments