Few Windows problems are more frustrating than watching your PC display “Preparing Automatic Repair” every time it starts. Instead of loading Windows, the computer enters a repair loop that never finishes or repeatedly restarts.
In some cases, the spinning dots continue for hours. In others, the system briefly shows the Automatic Repair screen before rebooting and starting the process again.
The good news is that this issue doesn’t always mean Windows is permanently damaged. It can be triggered by corrupted startup files, a failed Windows update, disk errors, incompatible drivers, or even a failing storage device.
The right solution depends on what caused the problem, so it’s best to work through the fixes in a logical order rather than jumping straight to reinstalling Windows.
This guide explains why Windows 11 gets stuck on Preparing Automatic Repair, how to identify the most likely cause, and the safest methods to get your PC working again without losing your files whenever possible.
Why Windows 11 Gets Stuck on Preparing Automatic Repair
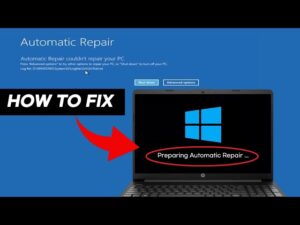
Automatic Repair is a recovery feature built into Windows. It’s designed to detect startup problems and repair them before Windows loads.
Normally, it runs only when Windows fails to boot correctly several times in a row. When it becomes stuck, it usually means Windows cannot complete the repair process because another problem is preventing startup.
Common causes include:
- Corrupted Windows system files
- Damaged Boot Configuration Data (BCD)
- File system corruption
- Bad sectors on the SSD or hard drive
- Interrupted Windows updates
- Recently installed drivers or software
- Hardware failures such as a failing SSD or faulty RAM
- BIOS or UEFI configuration issues
Understanding the cause helps determine which repair method is most appropriate.
Before You Start
Before making changes to Windows, try a few simple checks.
Disconnect every unnecessary USB device, including:
- USB drives
- External hard drives
- Printers
- Card readers
- USB hubs
Occasionally, Windows attempts to boot from an external device or encounters a hardware conflict during startup.
If your laptop has recently lost power during an update or shut down unexpectedly, connect it to its charger before continuing.
If your computer eventually reaches the recovery screen after several minutes, avoid forcing another restart unless instructed.
Force Windows into the Recovery Environment
If Windows remains stuck on the repair screen, you’ll need to access the Windows Recovery Environment (WinRE).
Method 1: Interrupt the boot process
- Hold the power button until the PC turns off.
- Turn it back on.
- As soon as the Windows logo appears, hold the power button again.
- Repeat this process three times.
- Windows should display Preparing Automatic Repair followed by Advanced options.
Method 2: Use a Windows 11 installation USB
If the recovery environment never appears:
- Create a Windows 11 installation USB on another computer.
- Boot from the USB.
- Choose your language.
- Select Repair your computer instead of Install now.
- Open Troubleshoot > Advanced options.
Most of the repairs below are performed from this menu.
Run Startup Repair
Startup Repair is designed specifically to fix boot problems.
Although your PC may already be stuck in Automatic Repair, manually running Startup Repair sometimes succeeds where the automatic process fails.
Steps:
- Open Advanced options.
- Select Startup Repair.
- Choose your Windows installation.
- Wait while Windows scans and repairs startup files.
This process can take several minutes.
If Startup Repair reports it couldn’t repair your PC, move to the next method instead of repeatedly running it.
Boot into Safe Mode
Safe Mode starts Windows with only essential drivers and services.
If Windows boots successfully in Safe Mode, the problem is often caused by a recent driver, update, or software installation rather than damaged Windows itself.
To enter Safe Mode:
- Open Advanced options.
- Select Startup Settings.
- Click Restart.
- Press 4 for Safe Mode or 5 for Safe Mode with Networking.
Once inside Safe Mode:
- Uninstall recently installed applications.
- Remove recently installed drivers.
- Disconnect unnecessary hardware.
- Restart normally.
If Windows starts normally afterward, one of those recent changes was likely responsible.
Repair Corrupted System Files Using Command Prompt
Corrupted Windows files are among the most common causes of repair loops.
Open:
Advanced options > Command Prompt
Run:
sfc /scannow /offbootdir=C: /offwindir=C:WindowsIf Windows is installed on another drive letter in recovery mode, replace C: with the correct drive.
After SFC finishes, run:
DISM /Image:C: /Cleanup-Image /RestoreHealthDISM repairs the Windows image that SFC relies on.
If either tool reports repairs were made, restart the computer before trying additional fixes.
Check the Disk for File System Errors
File system corruption can prevent Windows from starting correctly.
Run:
chkdsk C: /f /rThe scan may take anywhere from several minutes to several hours depending on:
- Drive size
- SSD versus HDD
- Number of errors
The /r switch checks for bad sectors and attempts to recover readable data.
If CHKDSK reports numerous bad sectors, the storage drive may be beginning to fail. While Windows might boot afterward, it’s wise to back up important files as soon as possible.
Rebuild the Boot Configuration
The boot configuration tells Windows how to start.
If these files become corrupted, Windows may repeatedly enter Automatic Repair.
Open Command Prompt and run:
bootrec /fixmbrThen:
bootrec /fixbootIf you receive:
Access is denieddon’t panic. This error is common on UEFI systems.
Continue with:
bootrec /scanosFinally:
bootrec /rebuildbcdIf Windows installation is detected, type:
Yto add it.
Restart your PC afterward.
Uninstall the Latest Windows Update
Windows updates occasionally fail midway through installation, leaving the system unable to boot.
Recovery Environment includes tools to remove problematic updates.
Navigate to:
Advanced options
→ Uninstall Updates
You’ll usually see two options:
- Uninstall latest quality update
- Uninstall latest feature update
Start with the quality update since it’s smaller and more likely to be responsible for a recent boot issue.
Only remove the feature update if the problem began immediately after installing a major Windows version upgrade.
Use System Restore
If System Restore was enabled before the problem occurred, this can often reverse system changes without affecting personal files.
Choose:
Advanced options
→ System Restore
Select a restore point created before the repair loop began.
System Restore removes:
- Installed applications
- Drivers
- Windows updates
It normally leaves documents, photos, and other personal files untouched.
Disable Automatic Repair Temporarily
Sometimes Windows repeatedly launches Automatic Repair even though the underlying issue has already been fixed.
From Command Prompt:
bcdedit /set {default} recoveryenabled NoRestart the computer.
If Windows starts normally, you can re-enable Automatic Repair later with:
bcdedit /set {default} recoveryenabled YesThis method should only be used after attempting the repair steps above. Disabling Automatic Repair doesn’t fix startup problems on its own—it simply stops Windows from entering the recovery loop automatically.
Reset Windows While Keeping Your Files
If startup repairs fail but the storage drive is healthy, resetting Windows may be the fastest way to restore a working system.
Choose:
Troubleshoot
→ Reset this PC
→ Keep my files
This option:
- Keeps personal files
- Removes installed applications
- Reinstalls Windows
- Resets system settings
Although your documents are preserved, you’ll need to reinstall desktop software afterward.
If Windows cannot complete the reset, the installation may be too heavily damaged or the drive may have hardware problems.
Check for Hardware Problems
If none of the software repairs work, hardware should become the primary suspect.
Failing SSD or Hard Drive
Warning signs include:
- Clicking noises from hard drives
- Extremely slow repairs
- Frequent disk errors
- CHKDSK finding many bad sectors
Replacing the drive is often the permanent solution.
Faulty RAM
Memory problems can also prevent Windows from booting consistently.
You can run Windows Memory Diagnostic from recovery tools or use a dedicated memory testing utility if you have access to another computer.
BIOS or UEFI Settings
If you’ve recently changed BIOS settings, restore the defaults.
Incorrect storage controller settings or boot mode changes can prevent Windows from loading.
Avoid updating the BIOS unless you’re certain it’s related to the issue, as an interrupted BIOS update can render the system unbootable.
Common Mistakes to Avoid
Many people make the situation worse by trying random fixes without understanding what they do.
Avoid these mistakes:
- Force restarting the PC repeatedly for long periods
- Interrupting CHKDSK while it’s repairing the drive
- Formatting the Windows partition before attempting recovery
- Running boot repair commands on the wrong drive letter
- Ignoring signs of hardware failure
- Disabling Secure Boot or TPM without a clear reason
Working through repairs methodically gives you the best chance of recovering Windows without data loss.
If You Need to Recover Your Files First
If your files are more important than repairing Windows immediately, recover them before attempting risky repairs.
Several options are available:
- Boot from a Linux live USB and copy files to an external drive.
- Use another computer to connect the SSD or hard drive through a USB adapter.
- Remove the drive from a desktop PC and attach it as a secondary drive to another system.
If the drive appears physically damaged or makes unusual noises, avoid repeated power cycles. Every additional attempt can reduce the chances of recovering your data.
Troubleshooting When Nothing Works
If you’ve tried every repair method and Windows still won’t boot, narrow the problem down by asking a few questions:
| Symptom | Most likely cause |
|---|---|
| Repair loop started after Windows Update | Failed update |
| Blue screen before Automatic Repair | Driver or hardware issue |
| Disk errors during CHKDSK | Storage drive failure |
| Startup Repair cannot find Windows | Damaged boot configuration or drive |
| PC freezes during every repair | Hardware fault, overheating, or failing SSD |
| Windows boots only in Safe Mode | Driver, software, or startup service conflict |
Looking for patterns often points you toward the correct fix instead of repeating unsuccessful repairs.
When a Clean Installation Is the Best Option
A clean installation should be your last resort, not your first.
Consider reinstalling Windows if:
- Startup Repair consistently fails.
- System file repairs find unrecoverable corruption.
- Reset this PC cannot complete.
- Malware has severely damaged Windows.
- The installation has accumulated multiple unresolved startup issues.
Before reinstalling, make every effort to back up your personal files if the drive is still accessible.
A clean installation removes software-related corruption, but it won’t fix failing hardware. If the repair loop returns soon after reinstalling Windows, investigate the SSD, hard drive, RAM, or motherboard instead.
Final Thoughts
A Windows 11 system stuck on Preparing Automatic Repair is usually recoverable without immediately reinstalling the operating system.
In many cases, the problem comes down to damaged startup files, file system corruption, a problematic update, or a driver that prevents Windows from booting correctly.
Start with the least invasive fixes, such as Startup Repair, Safe Mode, and system file checks. If those don’t resolve the issue, move on to rebuilding the boot configuration, uninstalling recent updates, or using System Restore.
Only consider resetting or reinstalling Windows after you’ve exhausted repair options and backed up any important data.
If software repairs repeatedly fail or disk checks report hardware errors, don’t overlook the possibility of a failing SSD or hard drive.
Replacing faulty hardware may be the only permanent solution, and recognizing that early can save time and help protect your data before the drive deteriorates further.
Related Articles
- How to Clone Windows to SSD Without Reinstalling Everything
- Fix Windows 11 Black Screen After Login With Cursor: 12 Proven Ways to Restore Your Desktop
- How to Enable TPM 2.0 for Windows 11 Installation
- Why Is File Explorer Opening Slowly in Windows 11? Causes, Fixes, and Ways to Speed It Up
If you think there’s been a mistake here, please do let us know by commenting on this post or Contact Us. And a member of our Content Integrity Team will review this decision with you.