

If you’re preparing to install Windows 11 and see a message that your PC doesn’t meet the minimum system requirements, TPM 2.0 is often the reason. Many modern computers already include a Trusted Platform Module (TPM), but it’s frequently disabled by default in the firmware settings.
The good news is that enabling TPM 2.0 usually takes only a few minutes. The exact steps depend on your motherboard or laptop manufacturer, but the overall process is straightforward once you know where to look.
This guide explains what TPM 2.0 is, how to check whether your PC already has it, how to enable it in your BIOS or UEFI firmware, and what to do if your computer doesn’t support it.
What Is TPM 2.0?
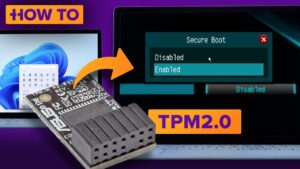
Trusted Platform Module (TPM) is a security feature that stores encryption keys and performs security-related operations in hardware or firmware.
Windows 11 requires TPM 2.0 because Microsoft designed the operating system with stronger security as a baseline. TPM works alongside features such as:
- BitLocker drive encryption
- Windows Hello
- Secure Boot
- Device encryption
- Credential protection
- Secure key storage
Unlike older versions of Windows, Windows 11 assumes these security technologies are available on supported hardware.
TPM doesn’t make your computer faster, nor does it affect everyday performance. Its purpose is to improve security by protecting sensitive information from malware and physical attacks.
Why Windows 11 Requires TPM 2.0
Microsoft introduced TPM 2.0 as a mandatory requirement to improve resistance against modern attacks such as ransomware, credential theft, and firmware-level malware.
Without TPM, encryption keys often remain in system memory where attackers may have a better chance of accessing them.
TPM allows Windows to safely store:
- Encryption keys
- Digital certificates
- Password-related credentials
- Security measurements during startup
This creates a more secure chain of trust from the moment the PC powers on.
Before You Start
Before changing BIOS settings, check a few things.
You should know:
- Your computer model
- Whether your CPU supports TPM 2.0
- Your Windows version
- Whether Secure Boot is already enabled
It’s also a good idea to save any open work before restarting into the BIOS.
Check Whether TPM Is Already Enabled
Many users discover TPM is already active.
Method 1: Use TPM Management
- Press Windows + R.
- Type:
tpm.msc- Press Enter.
Look for one of these results:
TPM is ready for use
This means TPM is enabled.
Check the Specification Version field.
If it says 2.0, your PC already satisfies this requirement.
Compatible TPM cannot be found
This usually means one of two things:
- TPM is disabled in BIOS.
- Your hardware does not include TPM support.
Method 2: Use Windows Security
- Open Settings.
- Go to Privacy & Security.
- Select Windows Security.
- Open Device Security.
If Security Processor details appear, TPM is active.
Opening those details also shows the specification version.
Method 3: Use PowerShell
Open PowerShell as Administrator and run:
Get-TpmLook at these values:
TpmPresent : True
TpmReady   : True
If both are True, TPM is working correctly.
How to Enter BIOS or UEFI
Since TPM is controlled by motherboard firmware, you’ll need to access the BIOS or UEFI settings.
From Windows
- Open Settings.
- Go to System > Recovery.
- Under Advanced startup, click Restart now.
- Select:
- Troubleshoot
- Advanced options
- UEFI Firmware Settings
- Restart
Your computer will boot directly into the firmware interface.
During Startup
Restart the computer and repeatedly press the BIOS key before Windows starts.
Common keys include:
| Manufacturer | BIOS Key |
|---|---|
| ASUS | Delete or F2 |
| MSI | Delete |
| Gigabyte | Delete |
| ASRock | F2 or Delete |
| Dell | F2 |
| HP | Esc, then F10 |
| Lenovo | F1 or F2 |
| Acer | F2 |
| Samsung | F2 |
Laptop manufacturers sometimes use different shortcuts, so check your manual if these don’t work.
How to Enable TPM 2.0
The wording varies between manufacturers because AMD and Intel use different names for firmware TPM.
Don’t worry if you don’t see an option literally called “TPM.”
On Intel Systems
Intel typically labels firmware TPM as:
- Intel Platform Trust Technology (PTT)
- Intel PTT
Steps are usually:
- Open BIOS.
- Switch to Advanced Mode if necessary.
- Open:
- Security
- Trusted Computing
- Advanced
- Locate Intel PTT.
- Change it to Enabled.
- Save changes.
- Restart.
On AMD Systems
AMD refers to firmware TPM as:
- AMD fTPM
- Firmware TPM
- AMD CPU fTPM
Typical process:
- Enter BIOS.
- Open Advanced settings.
- Find AMD fTPM.
- Enable it.
- Save settings.
- Restart.
If You See “Discrete TPM”
Some desktop motherboards support an optional physical TPM chip.
Possible options include:
- Discrete TPM
- Firmware TPM
- Intel PTT
- AMD fTPM
If you do not own a physical TPM module, choose the firmware option.
Most PCs manufactured within the past several years already support firmware TPM without requiring additional hardware.
Save Changes Correctly
After enabling TPM:
- Press F10 on most systems.
- Confirm the changes.
- Allow the computer to restart.
If you exit without saving, TPM remains disabled.
Verify TPM After Restarting
Once Windows loads again:
- Press Windows + R.
- Type:
tpm.mscYou should now see:
- TPM is ready for use
- Specification Version: 2.0
If so, Windows 11 should recognize the requirement.
What If the TPM Option Doesn’t Appear?
Sometimes the setting isn’t visible even on supported hardware.
Several reasons are possible.
BIOS Needs Updating
Older BIOS versions may hide TPM settings or lack support for newer processors.
Updating the BIOS can:
- Add TPM support
- Improve hardware compatibility
- Fix firmware bugs
Because a failed BIOS update can prevent a system from booting, follow the motherboard or laptop manufacturer’s instructions carefully. Make sure the update is intended for your exact model.
CPU Doesn’t Support Firmware TPM
Older processors may not include TPM functionality.
Generally:
- Intel 8th Generation Core processors and newer are officially supported for Windows 11.
- AMD Ryzen 2000 series and newer are commonly supported, with some earlier exceptions.
Some older CPUs may offer firmware TPM but still fall outside Microsoft’s supported processor list.
TPM Is Hidden Behind Another Setting
Some BIOS interfaces hide TPM until another option is enabled.
Look for settings such as:
- Trusted Computing
- Security Device Support
- Security Chip
- PCH-FW Configuration
- Computing Security
Enabling one of these may reveal the TPM option.
Legacy Boot Mode Is Enabled
Some systems hide TPM-related features when using Legacy BIOS or Compatibility Support Module (CSM).
If your hardware supports UEFI:
- Switch the boot mode to UEFI.
- Disable CSM if appropriate.
- Save changes.
- Restart.
Be careful when changing boot modes on an existing Windows installation. Switching from Legacy BIOS to UEFI without converting the system disk can prevent Windows from booting. If Windows is already installed, verify that your drive uses the GPT partition style before making this change.
Do You Also Need Secure Boot?
Usually, yes.
Windows 11 requires both:
- TPM 2.0
- Secure Boot capability
Many computers have TPM enabled while Secure Boot remains disabled.
You can verify Secure Boot by:
- Press Windows + R.
- Type:
msinfo32Look for:
- Secure Boot State
- BIOS Mode
If Secure Boot is off, enable it in BIOS after confirming your system is configured for UEFI boot.
Can You Install Windows 11 Without TPM 2.0?
There are unofficial methods that bypass Microsoft’s hardware checks, including registry modifications and custom installation media.
While these methods may allow Windows 11 to install, they come with important trade-offs:
- Microsoft does not support installations on unsupported hardware.
- Future updates may not be guaranteed.
- Some security features will not work as intended.
- Compatibility issues may appear after major feature updates.
If your computer supports TPM 2.0, enabling it is the safer and more reliable approach.
Common Problems After Enabling TPM
Windows Still Says TPM Is Missing
Restart the computer once more after saving the BIOS settings.
If the message remains:
- Verify TPM is enabled in the firmware.
- Confirm the specification version is 2.0.
- Install the latest BIOS update if available.
- Ensure you’re not running an outdated Windows installation that has a detection issue.
TPM Shows Version 1.2
Windows 11 requires version 2.0.
Some business computers include older TPM hardware that cannot be upgraded through software alone. In that case, the only options are replacing the TPM module if the motherboard supports it or using newer hardware.
BitLocker Requests a Recovery Key
Enabling or changing TPM settings can alter the system’s security measurements. If BitLocker is protecting your drive, Windows may ask for the BitLocker recovery key during the next startup.
Before changing TPM settings on a BitLocker-encrypted system:
- Back up the BitLocker recovery key.
- Consider temporarily suspending BitLocker protection until the firmware changes are complete.
- Resume protection after confirming Windows starts normally.
This helps avoid being locked out of your data.
BIOS Settings Keep Resetting
If TPM becomes disabled after every reboot, check for:
- A weak or failing CMOS battery on older desktop systems.
- Firmware settings that aren’t being saved correctly.
- A BIOS update that addresses configuration issues.
Replacing the CMOS battery often resolves repeated firmware resets on aging hardware.
Frequently Asked Questions
Does enabling TPM erase data?
No. Simply enabling TPM in the BIOS does not erase your files or reinstall Windows.
However, avoid clearing the TPM unless you understand the consequences. Clearing it can affect encrypted data, Windows Hello credentials, and BitLocker-protected drives.
Is firmware TPM as good as a physical TPM?
For most home and business users, yes. Intel PTT and AMD fTPM meet Microsoft’s TPM 2.0 requirements and provide the security features Windows 11 expects.
A dedicated TPM chip may offer advantages in certain enterprise environments, but it is not required for a standard Windows 11 installation.
Can I add TPM to an older desktop?
Some desktop motherboards include a header for an optional TPM module. You must purchase a module that matches both your motherboard model and firmware version.
Even with a compatible module installed, the processor must still meet Windows 11’s supported hardware requirements.
How can I tell if my computer supports TPM before entering BIOS?
Check your computer’s specifications on the manufacturer’s website, or use tools such as tpm.msc, Get-Tpm in PowerShell, or the Windows Security app. These methods can often confirm whether TPM is present and whether it’s simply disabled.
Final Thoughts
Enabling TPM 2.0 for Windows 11 installation is usually much simpler than it first appears. In many cases, the feature is already built into modern Intel and AMD processors and only needs to be turned on in the BIOS or UEFI firmware.
Start by checking whether TPM is already active using tpm.msc or Windows Security. If it isn’t, enable Intel PTT or AMD fTPM in your firmware settings, save the changes, and verify that Windows detects TPM 2.0 after restarting. If the option is missing, a BIOS update, UEFI configuration change, or older unsupported hardware may be the cause.
Taking a few minutes to enable TPM correctly not only satisfies the Windows 11 installation requirements but also strengthens your system’s overall security for features such as BitLocker, Windows Hello, and secure boot protection.
Related Articles
- How to Stop Windows 11 From Using Too Much RAM
- How to Clone Windows to SSD Without Reinstalling Everything
- Printer Connected but Not Printing From Windows 11: 12 Proven Fixes That Actually Work
- How to Fix Slow Internet on Windows but Fast on Phone
If you think there’s been a mistake here, please do let us know by commenting on this post or Contact Us. And a member of our Content Integrity Team will review this decision with you.




This Post Has 2 Comments