

Reinstalling macOS sounds more destructive than it actually is. In most cases, a standard reinstall through Recovery Mode replaces the operating system files while leaving your user account, documents, photos, and applications untouched.
The confusion usually comes from mixing up two very different processes: reinstalling macOS, which is non-destructive, and erasing the disk before reinstalling, which wipes everything.
This distinction matters because the reason you’re reinstalling changes which approach makes sense. If your Mac is just running slowly, crashing randomly, or acting up after a failed update, a standard reinstall over your existing system usually fixes it without touching your files.
If you’re dealing with a deeper problem, like persistent corruption, malware you can’t remove, or you’re preparing to sell the machine, a full erase and reinstall is the more thorough option, and that’s the one where backing up first genuinely matters.
Reinstall vs. Erase and Reinstall: What’s the Difference
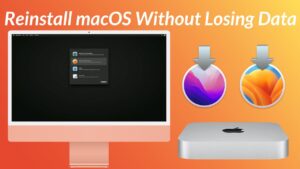
A reinstall over the existing system replaces core macOS files, including the kernel, system apps, and frameworks, while leaving your Users folder, installed third-party applications, and system settings in place. Apple designed this specifically as a repair option, and it’s what most people actually need when their Mac is misbehaving.
An erase and reinstall wipes the entire startup disk first, removing every file, then installs macOS fresh, as if the Mac just came out of the box. This is the right move if you’re selling or giving away the Mac, if the disk itself has file system corruption that a standard reinstall doesn’t fix, or if you want a genuinely clean slate to eliminate every trace of a problem, including things like malware that’s embedded itself outside the normal system folders.
Knowing which one you actually need saves you from an unnecessary full backup-and-restore cycle if a simple reinstall would have solved the problem.
Back Up Your Files First, Regardless of Which Method You Choose
Even though a standard reinstall shouldn’t delete your files, backing up first is not optional. Installations can fail partway through due to power loss, a corrupted download, or a bad disk sector, and recovering from that without a backup ranges from difficult to impossible.
Time Machine is the most straightforward option if you have an external drive available:
- Connect an external drive with enough free space to hold your data.
- Open System Settings > General > Time Machine.
- Click Add Backup Disk and select your external drive.
- Let the initial backup complete, which can take anywhere from twenty minutes to several hours depending on how much data you have.
If you don’t have an external drive, cloud backup services like iCloud Drive, Backblaze, or Google Drive can cover your most important folders, though a full Time Machine backup is more comprehensive since it captures your entire user account, including app data and system settings, not just files you’ve manually placed in a synced folder.
At minimum, before any reinstall, manually confirm you have copies of anything irreplaceable: documents, photos not already synced to iCloud Photos, saved passwords not stored in iCloud Keychain, and any project files tied to specialized software. It’s also worth noting your installed applications and license keys, since some apps, particularly ones purchased outside the Mac App Store, may need to be reinstalled and reactivated afterward if you choose the erase option.
Checking How Much Free Space You Need
Before starting, confirm you have enough free storage for the reinstall itself. Go to Apple menu > About This Mac > Storage to see your current usage. macOS installations typically need at least 20-35GB of free space depending on the version, though having significantly more free space avoids problems if the installer needs extra room for temporary files during the process.
If storage is tight, this is a good moment to clear out large files you don’t need, empty the Trash, and check for old iOS backups or unused applications taking up space before you begin.
How to Reinstall macOS Without Erasing Anything
This is the method for fixing performance issues, random crashes, or corruption without touching your files.
- Make sure your MacBook is connected to power.
- Restart the Mac.
- On Apple silicon Macs (M1, M2, M3, and later): Press and hold the power button as the Mac starts up, until you see the startup options window. Click Options, then Continue.
- On Intel Macs: Restart and immediately hold Command + R until you see an Apple logo or spinning globe.
- You’ll arrive at the macOS Recovery screen. Select Reinstall macOS [version name].
- Click Continue and follow the on-screen prompts.
- Choose your existing startup disk (usually named “Macintosh HD”) as the destination when prompted.
- Let the installation run. This typically takes 20 minutes to an hour depending on your internet speed, since the installer downloads fresh macOS files from Apple’s servers.
Your Mac will restart one or more times during this process. When it finishes, you’ll land back at your normal login screen with your files, apps, and settings intact, since this method installs over the existing system rather than replacing the disk’s contents.
If you’re on an older Intel Mac and Command + R doesn’t connect to the internet-based recovery, you can try Option + Command + R instead, which reinstalls the macOS version that either came with the Mac or the closest currently available version, useful if your local Recovery partition is damaged.
How to Erase and Reinstall macOS (Full Clean Install)
Use this method only after confirming your backup is complete, since this process deletes everything on the startup disk.
- Back up your data using the method described above. Do not skip this step.
- Restart your Mac and enter Recovery Mode using the same key combination as above (hold the power button on Apple silicon, or Command + R on Intel).
- From the Recovery window, select Disk Utility and click Continue.
- In Disk Utility, select your startup disk (usually “Macintosh HD”) from the sidebar. Make sure you’re selecting the physical disk, not just the volume, if you see both listed.
- Click Erase at the top of the window.
- Choose a name, format (APFS is standard for modern macOS), and scheme, then click Erase.
- Once erasing finishes, quit Disk Utility to return to the main Recovery window.
- Select Reinstall macOS [version name] and follow the prompts, choosing your freshly erased disk as the destination.
After installation completes, your Mac will boot into the macOS Setup Assistant, the same experience you’d get with a brand new machine, where you’ll create a new user account and can optionally restore your data from the Time Machine backup you made earlier.
Restoring Your Files After a Clean Install
If you erased the disk, the Setup Assistant gives you the option to restore from a Time Machine backup during the initial setup process. This is the simplest path, since it recreates your user account, files, and many app settings automatically.
If you’d rather set up a fresh account and migrate files manually, or you’re restoring at a later time instead of during initial setup, you can use Migration Assistant, found in Applications > Utilities, to pull data from a Time Machine backup or another Mac at any point after setup.
For a more selective restore, connect your Time Machine drive, open Time Machine from the menu bar or Launchpad, and browse through previous backups to manually copy specific folders back rather than restoring everything at once. This is useful if you want a genuinely lighter, decluttered system going forward rather than recreating your old setup exactly.
What Happens to Your Applications
With a standard reinstall over the existing system, your third-party applications remain installed, since the process only replaces core macOS files and leaves the Applications folder alone. You may occasionally need to reopen an app once to let it complete a minor reconfiguration, but reinstallation of the app itself usually isn’t necessary.
With an erase and reinstall, every application is gone along with everything else on the disk. Apps downloaded from the Mac App Store can be redownloaded for free using the same Apple ID. Apps purchased elsewhere need their original installer or download link, and in some cases a license key, so it’s worth compiling that list before you erase anything, particularly for paid software you didn’t purchase through Apple.
Common Problems During Reinstallation
The installer fails partway through with an error. This is often caused by an unstable internet connection, since the installer downloads several gigabytes of data from Apple. Try a wired connection if possible, or move closer to your Wi-Fi router, then restart the process from Recovery Mode again.
Recovery Mode won’t load or shows a “no internet connection” message. Check that Wi-Fi is connected within Recovery Mode itself, using the Wi-Fi icon in the menu bar at the top of the Recovery screen. If you’re on a network requiring a login page, like some public or hotel Wi-Fi, you may need to switch to a personal hotspot or a different network to complete the download.
Disk Utility shows the disk as unavailable to erase. This can happen if FileVault encryption is still processing, or if the disk has a hardware issue. Let any in-progress encryption or decryption finish before attempting the erase, and if the problem persists, run First Aid within Disk Utility first to check for and repair disk errors.
After reinstalling, some settings or preferences seem reset even though files remain. A standard reinstall occasionally resets minor system preferences, like certain notification settings or Bluetooth device pairings, even though it doesn’t touch your files. This is normal and just requires reconfiguring those specific settings rather than indicating something went wrong.
When to Choose a Professional Instead
If your Mac won’t boot into Recovery Mode at all, if Disk Utility reports errors it can’t repair, or if you suspect a hardware failure like a dying SSD, reinstalling macOS through the standard process may not work, or worse, may fail partway through in a way that complicates data recovery.
In these situations, it’s worth having an Apple Store or authorized repair provider assess the machine before attempting a reinstall yourself, particularly if you don’t already have a backup and the files on the drive are important. Data recovery from a failing drive is a specialized process, and attempting a full erase on a disk with underlying hardware problems can make recovery significantly harder afterward.
Frequently Asked Questions
Will a standard reinstall remove viruses or malware? Not reliably. Because it leaves your Users folder and applications intact, any malicious files stored outside the core system folders can survive a standard reinstall. If you’re dealing with malware you can’t otherwise remove, an erase and reinstall gives a genuinely clean result.
Do I need my Apple ID and password before starting? Yes. You’ll need your Apple ID to reinstall macOS, since the Recovery installer downloads through Apple’s servers and verifies your account, and you’ll need it again afterward to redownload Mac App Store apps if you erased the disk.
How long does reinstalling macOS take overall? A standard reinstall usually takes 20 minutes to an hour, depending mostly on your internet speed for downloading the macOS installer. An erase and reinstall takes a similar amount of time for the installation itself, plus whatever time your backup and restore process adds on either end.
Can I reinstall macOS without an internet connection? Generally no, since Recovery Mode downloads the installer from Apple’s servers. Some Macs also support a local Recovery partition through Command + R on Intel Macs, which may not require as large a download, but a stable internet connection is still typically needed to complete the process.
Will reinstalling macOS update it to the latest version automatically? A standard reinstall from Recovery typically reinstalls the version currently on your Mac. If you want the newest available macOS version, it’s usually simpler to update through System Settings > General > Software Update instead of using the Recovery reinstall process, unless you’re specifically troubleshooting an issue that requires Recovery Mode.
Conclusion
Reinstalling macOS doesn’t have to mean losing anything, as long as you understand which type of reinstall you’re actually doing. For most everyday problems, a standard reinstall through Recovery Mode repairs the system while leaving your files, apps, and settings exactly where they were. Reserve the full erase and reinstall for situations that genuinely call for a clean slate, and treat backing up beforehand as a required step rather than an optional precaution, since it’s the difference between a smooth fix and a stressful recovery situation if something goes wrong along the way.
Related Articles
- How to Clean System Data Taking Too Much Storage on Mac
- How to Recover Permanently Deleted Files Without Backup on Mac
- How to Reset NVRAM on MacBook to Fix Startup Issues
- How to Change the Default Browser on MacBook
If you think there’s been a mistake here, please do let us know by commenting on this post or Contact Us. And a member of our Content Integrity Team will review this decision with you.





This Post Has One Comment