

Setting up a new Android phone used to mean plugging in a cable, or reinstalling every app one at a time from scratch. Google’s built-in transfer tools have gotten good enough that most people never need a cable at all anymore.
The right method depends mostly on how much data you’re moving, and whether both phones are physically together during setup.
A modest setup with a handful of apps and a few hundred photos transfers quickly with almost no friction. A phone with years of accumulated apps and multiple messaging apps requires more patience, and sometimes a few manual steps afterward.
The Built-In Method: Google’s Switch Tool During Setup
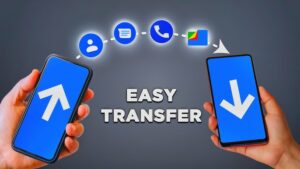
The most reliable wireless transfer method appears automatically during setup on a new phone. It handles apps, contacts, photos, messages, settings, and Wi-Fi passwords without a separate app.
- Turn on your new phone and begin setup. Select “Copy apps & data” when prompted.
- Bring your old phone close to the new one. Both need Bluetooth and Wi-Fi enabled, held within a few inches of each other.
- A QR code or connection prompt appears on one phone. Scan or confirm it on the other to establish a direct connection.
- Choose what to transfer. You’ll see options for apps, photos, contacts, messages, and settings, with the ability to deselect anything.
- The transfer happens over a direct Wi-Fi connection between the phones, not your home network, which is faster and doesn’t use mobile data.
This is the easiest method when both phones are together and you’re setting up the new one for the first time. Transfer time depends on data volume, 30 minutes to over an hour for a large library, 10 to 15 minutes for a lighter setup.
If You’ve Already Finished Setup: Use Google’s Switch App
If your new phone is already set up and you skipped the transfer, Google’s dedicated Switch app handles this separately.
- Download “Switch” from the Play Store on both phones.
- Open Switch on the new phone, select “I have a new device.”
- Open Switch on the old phone, select “I have an old device.”
- Follow the pairing steps: bring the phones close, confirm the code, select what to transfer.
This works essentially the same as the setup-time version but gives you control over timing.
Transferring Specific Categories Individually
Sometimes a full transfer isn’t what you want, either because you’re switching manufacturers or only need certain data moved.
Photos and Videos
If both phones have Google Photos signed into the same account, this is effectively automatic. Anything backed up on the old phone is already accessible on the new one, no manual transfer needed.
Contacts
If your contacts sync to Google, checked under Settings, Accounts, Account Sync, they’ll appear automatically on the new phone. Locally stored contacts need exporting as .vcf first.
Messages
If both phones use Google Messages, history transfers automatically. Third-party apps like WhatsApp have their own separate backup process within the app itself.
Apps
Apps reinstall automatically from the Play Store, along with most data. Games with local save data may need signing into an in-app account to recover progress.
Transferring Between Different Manufacturer Ecosystems
Moving from Samsung to Pixel, or OnePlus to Samsung, introduces complexity beyond standard transfer. Manufacturer-specific features, Bixby Routines, theme store purchases, health data, generally don’t transfer across brands.
Samsung Health specifically requires exporting through Samsung’s own tools before switching away. Check each manufacturer’s own migration tool if switching brands entirely.
Handling Two-Factor Authentication Apps Specifically
This deserves attention, since getting it wrong can lock you out of accounts. Older Google Authenticator required manual re-setup of every account.
Newer versions support syncing codes to your Google account, verifiable under the app’s settings. Authy and Microsoft Authenticator have their own backup features. Set these up and confirm they work before wiping the old phone.
What to Do If the Transfer Fails Partway Through
Occasionally a wireless transfer stalls with a large amount of data or an unstable connection. Restarting both phones and starting over generally resolves it.
You can also fall back to a USB-C cable transfer for very large data sets, noticeably faster and more reliable.
Frequently Asked Questions
Do I need to factory reset my old phone after transferring?
Not immediately. Keep it functional for a few days in case something didn’t transfer correctly. Reset it before selling or recycling once everything’s confirmed present.
Will my paid app purchases transfer automatically?
Yes, purchases are tied to your Google account, not a specific device. Signing in gives you access to redownload anything previously purchased.
Can I transfer data between an Android phone and an iPhone using these methods?
No, these are Android-to-Android only. Google offers a separate “Switch to Android” tool for moving from iPhone, a different process entirely.
Transferring From a Damaged or Unresponsive Old Phone
If your old phone has a cracked screen you can barely see, a broken touch input, or won’t power on reliably, the standard side-by-side transfer process may not be practical at all. There are still a few paths worth trying before assuming the data is unreachable.
If the phone still boots but the screen is unusable, connecting it to a computer via USB and enabling USB debugging beforehand, if you had it enabled, sometimes allows enough access to pull photos and files off manually even without a usable display. This requires having planned ahead, since enabling USB debugging after the screen is already broken isn’t possible without seeing the screen to do it.
If the phone won’t power on at all, and the data genuinely matters, professional data recovery services can sometimes extract data directly from the storage chip, though this is expensive and works best when attempted quickly rather than after extended water damage or physical destruction.
Why Some Transfers Take Much Longer Than the Estimate Suggests
The Play Store and transfer tools sometimes show a rough time estimate that turns out to be wildly optimistic, particularly for large app libraries. This usually isn’t a sign anything is broken, it’s a reflection of how the transfer process actually works in stages.
Photos and files transfer directly and predictably, at a fairly consistent speed. Apps, however, aren’t copied directly, they’re re-downloaded fresh from the Play Store on the new device, meaning the actual speed depends on Play Store server load and your internet connection at that moment, not just the direct phone-to-phone Wi-Fi speed used for the rest of the transfer.
If a transfer seems stuck specifically on the apps portion for an extended period, checking your Wi-Fi connection to the internet, not just the direct connection between the two phones, is worth doing, since these are actually two separate network paths working simultaneously.
Setting Up a New Phone Without Your Old One Present at All
If you no longer have access to your old phone, lost, sold, or destroyed before you got a new one, you can still recover most of what matters as long as your data was backed up to your Google account rather than stored locally only.
Simply sign into the same Google account during setup on the new phone. Contacts, Google Photos, and any app data that supported cloud backup restore automatically without needing the old device present at all.
What you’ll miss without the old phone available are things that only ever lived locally: messages from third-party apps without cloud backup enabled, and any files that were never backed up anywhere. This is exactly why enabling backups proactively, rather than only thinking about it during a transfer, matters for situations exactly like this one.
Transferring App Data for Apps That Don’t Support Standard Backup
Not every app supports Android’s built-in backup system for its own internal data. Some apps, particularly ones with local databases or offline content, store data in a way the standard transfer simply skips over entirely.
Check the specific app’s own settings for an export or backup option before switching phones, particularly for note-taking apps, password managers, and habit trackers where losing local data would genuinely matter. Many of these apps support exporting to a file you can manually import on the new device afterward.
Transferring Music and Local Media Files That Aren’t in the Cloud
If you have music, videos, or other media files stored locally on your old phone rather than through a streaming service, these need explicit attention during a transfer, since they’re not automatically covered by app data backup or Google Photos the way pictures and videos taken with the camera are.
Local music files specifically are worth checking in a Music folder within your Files app. The standard device-to-device transfer generally does move these files along with general media, but it’s worth confirming afterward on the new device rather than assuming, since some manufacturer-specific music apps store files in locations the general transfer process doesn’t always catch completely.
Home Screen Icon Layout and Widget Placement Workarounds
If preserving your exact home screen layout matters to you and you’re staying within the same manufacturer ecosystem, some manufacturer backup tools do a better job of preserving this than Google’s general transfer tool does. Samsung Smart Switch, for example, is somewhat more effective at recreating your Samsung-specific home screen layout than Google’s Switch tool alone.
If you’re switching manufacturers entirely, accept that layout recreation isn’t realistic, and instead take a screenshot of your old home screen before switching, which at least gives you a reference to manually recreate a similar arrangement on the new phone rather than trying to remember from scratch.
What to Do About Call History and Voicemail Specifically
Call history generally transfers as part of the standard device-to-device process, appearing in your Phone app’s recent calls list on the new device. Voicemail is handled differently and depends heavily on your specific carrier and phone setup.
Visual voicemail, where messages appear as a list you can tap to play, is often tied to your carrier account and SIM card rather than the phone itself, meaning it typically continues working once you move your SIM to the new phone, independent of any data transfer process at all. If you use a third-party voicemail app instead of your carrier’s built-in visual voicemail, check that specific app for its own backup or account-based access rather than expecting it to transfer with everything else.
Frequently Asked Questions, Continued
Does the transfer process work between phones on completely different Android versions?
Generally yes, the transfer tool is designed to work across a reasonably wide range of Android versions, though a very old phone running an Android version from many years ago may show reduced compatibility for certain data types specifically, even while the core transfer still functions for the basics.
Can I transfer just my apps without moving photos and contacts at all?
Yes, the selection screen during transfer lets you deselect categories you don’t want moved, so you can choose to transfer only apps if photos and contacts are already handled through other means, like existing cloud sync you’ve already confirmed is working.
What to Check Immediately After a Transfer Completes
Once the transfer finishes, it’s worth doing a quick verification pass rather than assuming everything came through correctly. Open your most-used apps individually and confirm you’re logged in and your data appears as expected.
Check your photo count in Google Photos against what you remember having on the old phone. Confirm your contacts list looks complete rather than missing recently added entries.
This five-minute check catches gaps while the old phone is still available to pull from manually, rather than discovering something missing weeks later when the old phone may already be wiped or gone.
Handling Widgets and Home Screen Layout Separately
Your home screen layout, which widgets you had placed and where, generally doesn’t transfer as cleanly as apps and data do, particularly when switching between different manufacturer launchers. Samsung’s launcher and Pixel’s launcher, for example, handle layout data differently enough that a full recreation isn’t guaranteed.
Don’t be surprised if you need to manually rebuild your home screen layout and re-add widgets after a transfer, even when everything else came through perfectly. This is a cosmetic step rather than a data loss concern, but worth expecting rather than assuming something went wrong.
Preparing Your Old Phone Before Selling or Trading It In
Once you’ve confirmed everything transferred correctly to your new phone, properly wiping the old one before selling, trading in, or giving it away matters for privacy, not just for freeing it up for someone else’s use.
Go to Settings, System, Reset Options, then Erase All Data, on the old phone specifically, only after you’ve fully verified the new phone has everything you need. Before doing this, sign out of your Google account on the old device separately, since a factory reset alone doesn’t always fully remove Factory Reset Protection tied to your account, which can otherwise make the phone unusable for whoever receives it next.
Also remove the SIM card physically if you’re keeping your phone number for the new device, and check whether the old phone had an SD card installed, since a factory reset doesn’t necessarily erase a removable SD card the same way it wipes internal storage.
Double-Checking Cloud Storage Apps Beyond Google Photos
If you use additional cloud storage services beyond Google’s own, Dropbox, OneDrive, or a manufacturer-specific cloud service, these maintain their own independent sync state separate from Google’s transfer tool entirely, and won’t be covered by the standard Android transfer process at all.
Confirm you’re signed into each of these services individually on the new phone, and that sync is actively running rather than paused, particularly if you rely on any of them for documents or files you’d genuinely miss if they weren’t accessible on the new device right away.
Using Nearby Share for Individual Files
For transferring specific files rather than a full setup, Nearby Share is faster and more targeted. It works similarly to AirDrop, using Bluetooth and Wi-Fi Direct without needing internet.
- Open the file, tap Share, then select Nearby Share.
- On the receiving phone, make sure Nearby Share is enabled and visible under Settings, Google, Devices & Sharing.
- Select the receiving device and accept the transfer.
Worth knowing for one-off transfers even outside a full phone switch, since it’s faster than emailing yourself a file.
What Doesn’t Transfer Automatically
A few things commonly get missed: two-factor authentication codes, covered above, payment card details in Google Pay or Samsung Pay, which need manual re-adding for security reasons, and app-specific login sessions for apps that don’t support Android’s backup system.
Conclusion
For most people, the built-in transfer handles the vast majority of what you need, without extra apps or cables, and it’s fast when done directly between two nearby phones sitting close together in the same room.
Photos and contacts synced to Google largely transfer themselves through cloud sync. The main things worth double-checking manually are two-factor authentication apps and third-party messaging apps with their own backup systems.
A quick verification pass right after the transfer completes, checking your most-used apps, your photo count, and your contact list, catches gaps while the old phone is still around to pull from, which is far easier than discovering something missing weeks later.
If you think there’s been a mistake here, please do let us know by commenting on this post or Contact Us. And a member of our Content Integrity Team will review this decision with you.


