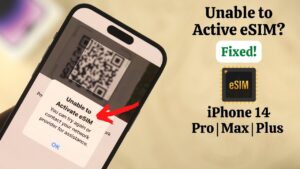
If your eSIM activation on iPhone is stuck, fails with an error, or leaves you with “No Service,” the problem can come from several places. The iPhone needs a supported eSIM, a compatible carrier plan, an internet connection during setup, and the correct carrier settings.
A problem with any one of those can prevent activation even when the eSIM itself is valid. Apple currently recommends checking the connection, restarting the iPhone, verifying the cellular line, and checking for carrier settings updates before contacting the carrier.
The good news is that you can usually narrow down the cause without immediately deleting the eSIM or resetting the entire iPhone. The safest approach is to work through the checks in order, starting with simple connection problems and ending with carrier or device-specific issues.
Check Whether Your iPhone and Carrier Support eSIM
Before troubleshooting the activation process itself, confirm that your setup is actually supported.
Apple supports eSIM on iPhone XS, iPhone XS Max, iPhone XR, and later models, although availability also depends on the country, region, carrier, and particular iPhone model. Some regional iPhone variants have different SIM capabilities, so simply owning a recent iPhone does not guarantee that every eSIM feature is available.
Your carrier must also support eSIM activation. Apple maintains a current list of carriers and the activation methods they support, such as QR codes, carrier apps, carrier activation, and other methods.
If you’re in Nigeria, Apple currently lists 9mobile, Airtel, Glo, and MTN as carriers supporting other eSIM activation methods on iPhone. Carrier support can change, so check Apple’s current carrier list or confirm directly with your network provider before assuming the iPhone is the problem.
You should also make sure the iPhone is not carrier-locked if you’re trying to use an eSIM from a different network. Open Settings > General > About and look for Carrier Lock. If it says No SIM restrictions, the iPhone is unlocked. If it shows a restriction, you may need the original carrier to unlock the device.
Connect the iPhone to Wi-Fi Before Activating the eSIM
An internet connection is often required when an eSIM is being installed or activated. Apple recommends connecting a new iPhone to Wi-Fi or a personal hotspot during setup. Some eSIM-only iPhone models in certain regions can activate without Wi-Fi, but you should not rely on that when troubleshooting an activation problem.
Connect to a reliable Wi-Fi network and try the activation again. If you’re using a hotspot, make sure the hotspot has a working internet connection rather than merely showing that the iPhone is connected to it.
A weak or unstable connection can also cause an activation process to appear stuck. If the QR code or carrier activation screen has been sitting there for an unusually long time, reconnect to Wi-Fi and retry instead of repeatedly tapping the activation button.
If the iPhone was recently restored, updated, or transferred from another device, give it a stable internet connection before attempting the eSIM setup again.
Turn Airplane Mode On and Off
A temporary cellular connection problem can sometimes prevent the newly added eSIM from registering with the network.
Apple specifically recommends toggling Airplane Mode when an eSIM does not appear to be working.
- Open Control Center.
- Turn Airplane Mode on.
- Wait about 10 to 15 seconds.
- Turn Airplane Mode off.
- Wait for the cellular network name to appear.
Then check the top-right area of the screen or open Control Center to see whether the carrier appears.
This step is particularly useful when the eSIM has already been installed but the phone shows No Service, Searching, or a similar status. It is less likely to fix an eSIM that cannot be installed at all because of an invalid QR code or an unsupported carrier plan.
Check Whether the eSIM Line Is Already Installed
One common mistake is assuming that an activation failure means the eSIM was never added. Sometimes the cellular plan is already present on the iPhone but is disabled or has not completed network registration.
Open:
Settings > Cellular
Depending on your iOS version and region, the menu may also be labeled Mobile Service or Mobile Data.
Look for the phone number or cellular plan you are trying to activate. If it appears, tap the line and check whether Turn On This Line is enabled.
If the line is already present but inactive, turn it off, wait a few seconds, and turn it back on. Apple specifically recommends checking whether the number appears in the Cellular settings and toggling the line if necessary.
After enabling it, wait for the iPhone to register with the network. Avoid deleting the plan simply because it initially shows no service. Deleting an eSIM can make recovery more complicated if the carrier requires you to obtain a new activation QR code.
Restart the iPhone
Restarting the iPhone is a simple step, but it can resolve temporary problems with cellular registration and the activation process.
After turning the iPhone off and back on, give it a minute or two to reconnect to the carrier. Then open Settings > Cellular and check whether the eSIM line is active.
If you were transferring an eSIM from another iPhone, keep the old device available until the new device has successfully activated. Depending on the carrier and transfer method, the previous SIM may be deactivated when the new eSIM becomes active. Apple notes that eSIM Quick Transfer can deactivate the previous SIM after the new cellular plan activates.
Install Any Available Carrier Settings Update
Carrier settings tell the iPhone how to communicate with the mobile network. An update can be particularly important after installing a new eSIM or changing carriers.
To check manually:
- Connect your iPhone to Wi-Fi or a working cellular connection.
- Open Settings.
- Tap General.
- Tap About.
- Wait on this screen for a few seconds.
If a carrier settings update is available, iOS may display a prompt asking you to install it. Apple also says you can tap the carrier version shown in the relevant section to view additional carrier information.
If you recently activated a new eSIM, this check is especially useful because Apple notes that a new SIM or eSIM can require carrier settings to be downloaded.
After installing an update, restart the iPhone and check the eSIM again.
Update iOS Before Trying More Complicated Fixes
An outdated iOS version can cause compatibility problems with newer carrier features or eSIM activation methods.
Go to:
Settings > General > Software Update
If an update is available, install it while connected to power and a reliable Wi-Fi network.
Apple’s current eSIM troubleshooting guidance specifically recommends using the latest version of iOS that the iPhone supports.
This is especially relevant when moving a cellular plan to a newer iPhone. For example, Apple’s current eSIM Quick Transfer requirements include specific software and device conditions. Apple says both iPhones need to be on iOS 18.4 or later for that transfer method, along with Bluetooth enabled and the devices nearby.
If you’re using eSIM Quick Transfer and the option does not appear, don’t assume the iPhone is defective. Your carrier may simply not support that particular transfer method.
Troubleshoot eSIM Quick Transfer Between Two iPhones
If you’re moving your number from an old iPhone to a new iPhone, eSIM Quick Transfer can be easier than requesting a new QR code, but it has specific requirements.
Apple says both iPhones should be nearby, Bluetooth should be turned on, both devices should be signed in with the appropriate Apple Account, and the previous iPhone should be unlocked with its passcode. For the current Quick Transfer requirements, both devices should be running iOS 18.4 or later.
On the new iPhone, go to:
Settings > Cellular > Set Up Cellular or Add eSIM
Then choose the option to transfer a cellular plan from another iPhone.
Keep the old iPhone unlocked and nearby when prompted. If a verification code appears on the new iPhone, enter it on the old device when requested.
If the transfer option does not appear, check your carrier’s supported activation methods. Apple does not make every eSIM activation method available for every carrier.
Do not erase the old iPhone until you have tested calls, text messages, and cellular data on the new device.
If the QR Code Will Not Activate the eSIM
A QR code activation can fail for several reasons. The code may have expired, already been used, been generated for a different number, or require an additional confirmation code from the carrier.
If your carrier provided the QR code, scan it using the iPhone’s Camera app and follow the cellular setup prompt. Apple also supports tapping and holding an eSIM QR code received in a supported email app or browser on iOS 17.4 or later, followed by the option to add the eSIM.
If the QR code is displayed on another device, make sure the entire code is visible and the iPhone’s camera can focus on it clearly.
If you receive an error after scanning, don’t keep scanning the same code repeatedly. Contact the carrier and ask whether the eSIM activation code is still valid.
Some carriers also require a confirmation code after scanning. If the iPhone asks for one, use the code supplied by your carrier rather than guessing.
What to Do When the eSIM Says “Activating”
An eSIM can remain in an activation state while the carrier completes provisioning. Provisioning is the process of associating the cellular plan with your account and allowing the network to recognize the SIM.
First, make sure the iPhone has a reliable Wi-Fi connection. Then leave the phone connected for a short period and check whether the carrier name appears.
If it remains stuck:
- Toggle Airplane Mode.
- Check Settings > Cellular to see whether the line is present.
- Turn the line off and back on if it appears.
- Restart the iPhone.
- Check Settings > General > About for a carrier settings update.
- Try making a call or connecting to cellular data.
If the eSIM remains stuck after these steps, the carrier may need to complete activation on its side. At that point, repeatedly changing settings on the iPhone is unlikely to solve a provisioning problem.
Fix “No Service” After eSIM Activation
“No Service” does not necessarily mean the eSIM failed to install. The digital SIM can be installed correctly while the phone still cannot register with the network.
Start by checking that the cellular line is turned on under Settings > Cellular.
Then turn Airplane Mode on and off and restart the phone. Apple recommends these steps as part of its eSIM troubleshooting process.
Next, check the carrier settings under Settings > General > About.
You should also consider whether the carrier has an outage or whether your account has a billing or service restriction. Apple specifically recommends checking for service outages and account-related blocks when troubleshooting Dual SIM problems.
If another phone using the same carrier is also unable to connect in the same location, the problem may be network-related rather than specific to your iPhone.
Check the iPhone’s IMEI and EID Before Contacting the Carrier
If basic troubleshooting fails, the carrier will probably need information that identifies your iPhone and eSIM hardware.
Open:
Settings > General > About
Look for the IMEI and EID numbers.
The EID identifies the eSIM component of the device, while the IMEI identifies the cellular device. Apple recommends having your phone number, carrier account information, IMEI, and EID available when contacting the carrier about an eSIM activation problem.
Keep the error message visible or take a screenshot before contacting support. Telling the carrier exactly what appears on the screen can help them determine whether the problem is with the activation request, account, or device.
Avoid publishing your IMEI, EID, account PIN, or activation QR code publicly. These details should only be provided through the carrier’s official support channels when required.
Don’t Delete the eSIM Too Quickly
Deleting an eSIM is one of the more common troubleshooting mistakes.
If the plan is already installed, removing it does not necessarily fix the underlying problem. You may instead end up needing the carrier to issue a new QR code or activation request.
Before deleting an eSIM, determine what type of failure you’re dealing with. If the plan is visible under Settings > Cellular but says no service, the problem may be network registration or carrier provisioning rather than the eSIM installation itself.
If the carrier specifically tells you to remove the eSIM and install it again, follow its instructions. Otherwise, keep the existing plan in place while you investigate the problem.
When You Should Contact Your Carrier
If the iPhone passes the basic checks but activation still fails, the carrier is usually the right next step.
Contact the carrier when:
- The eSIM QR code produces an activation error.
- The eSIM remains stuck on activating.
- Your phone number does not transfer correctly.
- The carrier says the plan is not provisioned.
- The iPhone shows the eSIM but cannot connect to the network.
- You suspect an account, billing, or service restriction.
- The carrier needs to issue a replacement QR code.
- Your iPhone was recently changed, upgraded, or transferred between accounts.
Apple itself recommends contacting the carrier if an eSIM cannot be set up after the standard troubleshooting steps.
When you call, explain whether the problem occurs before or after the eSIM appears under Settings > Cellular. That distinction can save time because installing an eSIM and registering it with the carrier are related but different stages.
What to Check If You’re Using Dual SIM
If you have two cellular plans on the iPhone, activation problems can be confused with incorrect line settings.
Go to Settings > Cellular and select the number you want to use. Confirm that the line is enabled and that the correct number is selected for cellular data, calls, and messages according to your needs.
Apple’s Dual SIM documentation also recommends checking that both carriers appear in Control Center when both plans are configured.
If the newly added eSIM works for calls but cellular data does not, check which line is selected under the cellular data settings. The iPhone can have multiple active lines, but only one is normally selected as the primary cellular data line at a time.
When the Problem May Be the iPhone
Most eSIM activation problems are better investigated through the carrier and software settings before assuming there is a hardware fault.
A device-side problem becomes more plausible when:
- Multiple valid eSIMs fail to install.
- The iPhone consistently cannot detect or configure cellular service.
- Carrier settings are current but cellular activation repeatedly fails.
- The same carrier account works normally on another compatible iPhone.
- The carrier confirms that your plan and eSIM have been provisioned correctly.
If the carrier confirms that the account and activation are correct, Apple Support can help determine whether the iPhone itself needs further diagnosis. On iPhone models running iOS 18 or later, Apple also provides additional diagnostics through the Apple Support app.
A factory reset should not be your first response to an eSIM activation problem. It can remove settings and data without fixing a carrier-side provisioning issue.
Common eSIM Activation Mistakes to Avoid
A few troubleshooting habits can make the situation worse.
Deleting the eSIM immediately: If the plan is already installed, deletion may create another activation step without solving the original problem.
Using an old QR code: Some carrier QR codes are intended for one activation or a specific account. Request a new code if the carrier confirms the original one is no longer valid.
Skipping carrier settings updates: A newly installed eSIM may need current carrier settings to communicate properly with the network.
Ignoring the carrier account: An iPhone can be configured correctly while the account itself has a restriction, incomplete activation, or service problem.
Erasing the old phone too soon: When transferring an eSIM, keep the previous iPhone until the new one can make calls, send messages, and use cellular data.
Assuming every carrier supports the same activation method: One carrier may offer Quick Transfer while another may require a QR code, carrier app, or carrier-assisted activation. Apple’s carrier support pages identify the methods available by provider and region.
Final Thoughts
Troubleshooting eSIM activation on iPhone is mainly about identifying where the activation process has stopped. If the eSIM does not appear at all, check carrier compatibility, Wi-Fi, the activation method, and the QR code or transfer requirements. If the eSIM appears but shows “No Service” or remains inactive, focus on the cellular line, Airplane Mode, carrier settings, iOS updates, network availability, and account status.
The safest order is to start with the simple checks, confirm that the eSIM is actually installed, and avoid deleting the plan unless the carrier tells you to do so. If the iPhone is configured correctly but the carrier has not provisioned the number, only the carrier can usually complete that part of the activation. Apple recommends having your phone number, account details, IMEI, EID, and exact error message ready when you contact them or your network provider.
If you think there’s been a mistake here, please do let us know by commenting on this post or Contact Us. And a member of our Content Integrity Team will review this decision with you.